Monday, October 31, 2011

October Make Out - Night of the Crafting Dead

October's Make Out with Crown Town Handmade is the one I look forward to all year. Although a free craft taught by a local crafter every month is always fun, can you think of a better way to spend a Thursday evening then getting made up to look like the walking dead?

If it's not obvious from some of my projects, I love me some zombies. The shuffling and dead eyed Romero kind, the shrieking and flailing 28 Days Later kind, the wormy and meat-obsessed Slither ones, the vacant and gruesome Walking Dead sort, the exploding and gnawing House of the Dead ones. I love them all. Of course I leap at the chance to join their disgusting ranks for an evening.


We used the cheap make-up palettes you can find at the drug store. You'll also need sponges or brushes for applying, baby powder and a large brush to set everything once you're done, and a mirror or friend to help you apply.
You want to start out by applying a thin layer of white of gray to your face and neck. Don't glob it on; you want to look like you're bloodless, not a clown. (Unless you're going to zombie clown, and then more power to you.) If the make up is a little thick, you can soften it up a bit with some baby oil. Also, don't be afraid to use your fingers. You want to dab rather than swipe and don't forget your lips. Pay particular attention to areas that would be naturally highlighted; like your brow bone, the top of your nose, and tops of your cheeks. This will make these area stand out so you look more gaunt and gruesome once the "shadows" are applied. If you're not sure where to apply, shine a lamp in your face from above and see what spots are illuminated and which are in shadow.
Use a black or purple to make dark shadows around and under your eyes, in the hollows of your cheeks, and to accentuate any wrinkles. Anything girls generally want to hide, you want to color black. You'll probably need to make some stupid faces for this, it helps to show off various wrinkles. Suck in your cheeks, smile, scrunch up your eyes or forehead, stretch out your neck.


Once you have the base on, you can add bruises and marks. Use a pale blue eyeliner pencil to make winding veins. Make bruises with a mixture of purples, greens, yellows, and reds. Think about the colors in your own skin and what it looks like when you get a real bruise.


If you want a really fun and gross zombie, grab some liquid latex and congealed blood from the Halloween store or costume shop. (Obviously do not use liquid latex if you're allergic to latex.) Wipe the make up away where you want to apply the latex and spread a thin layer on. Wait for it to dry and then gently rub or pull at it to make it look like scraped or decaying skin. Add some red and purple and fake blood to make it look like bruised and bloody skin.

If you're allergic to costume make up or just want to look like a zombie that is more successful at catching unsuspecting victims, try making some edible fake blood. Not only is it safe to put in your mouth, it tastes a little like black forest cake. Much better than eating regular blood. Be aware that this stains like crazy and gets sticky, so wear clothes you don't care about ruining.
To make it, mix one packet of raspberry jell-o with half of the water called for. Mix in a container of the cheapest maple syrup you can find, like the $1 one. Mix in a few spoonfuls of cocoa powder, the kind used for baking not making cocoa. Once you like the color, mix in enough cornstarch to get a consistency you like. Once you're finished, get a mouthful of it and let it dribble down your face. (Think how your mouth is numb after the dentist.) Spit out any extra. You'll probably want to do this outside, which has the added bonus of making it look like there was a horrible, bloody murder.

Happy Halloween everyone. Comment below and let me see your costumes!

Thank you to the wonderful Plaza Muse for letting us use their space!

Tuesday, October 18, 2011

Nifty Thrifty: Thriftenstein

So, I'm a girl of simple tastes. A bit of a bargain hunter perhaps. If there's one thing I love more than thrift stores, it's thrift CRAFT stores. Craft supplies are awesome, but insanely cheap craft supplies make me have a small fits of glee. Not to mention that, like regular thrift stores, thrift craft stores are full of the hilarious mistakes of taste from years past. Naturually I was downright giddy when I got to visit not one, but two, thrift craft stores on a recent trip to California to visit my mom.


The Legacy Thrift & Gift Shop
781 Gravenstein Ave
Sebastopol, CA 95472

My mom and I paid a visit to The Legacy on my previous visit and we couldn't wait to get back again. We actually had excellent timing; we ended up going to day before they briefly closed for a remodel. The store is now three doors down at 789 Gravenstein Ave while the original space is being completely remodeled. The original shop was well organized and the staff is very helpful and friendly; I'm sure the new space is no different
Besides the great prices, you can feel doubly good about shopping there as proceeds benefit the Sebastapol Area Senior Center, which provides activities and classes for adults and seniors.


Fabric is sold by the pound, trims by the yard, and other materials are prices as marked. They have a large selection of supplies including sewing notions, books, cross-stitch and embroidery, yarns, appliques, and more. They also offer some ready made consignment items.


Our second stop was new to us, but had been around in one place or another since 1976.

801 Toland Street
San Francisco, CA 94124


SCRAP was started as a way to get donated craft and art supplies to underfunded schools as well as artists and parents. SCRAP now diverts up to 200 tons (that's TONS) of materials that would otherwise be sent to landfills. They also offer field trips, classes, volunteer opportunities, or simply just a place to find amazing and weird cheap stuff.
 

SCRAP is really dedicated to creative resuse, which means you'll find more than just your average art supplies. Not that the selection of art and craft supplies is anything to sneeze at. SCRAP offers fabric, paper goods, buttons, paints, trims, brushes, wood pieces, metal, and glass to name a few. The fun is in the entirely random and wonderful things hiding in there. The picture above is a detail of a huge drum on these. I have no idea what they are; I bought 20. There was a huge bin of teeny glass bottles; another of what looked like promo buttons. There was a rack of books and magazines, which housed a collection of sci-fi novels from the 70's. (I so would have bought them all if I hadn't been flying back.) My mom and I spent probably 45 minutes going through tubs of buttons.


Also, there is some rad signage.

Does anyone else visit any similiar places?

Thursday, October 13, 2011

Adolescent Abnormal Samurai Chelonians

Or Teenage Mutant Ninja Turtles, if you want to be technical.


Leonardo leads!
This little guys are the first of the dolls completed for NC Comicon, and I'm a little bummed I won't be keeping them. Despite all my incredibly girlish hobbies and tendencies, I did watch a ton of "boys" cartoons growing up and Teenage Mutant Ninja Turtles was one of my favorites. (I'm still a little tomboyish about television and movies; I love zombie movies and I can't watch a romantic movie without making puke noises. Because I am so mature.) I found this green fleece online and immediately knew it had to be turtles.


Donatello was my favorite, I think mostly because purple was my favorite color as a kid. He's also a big geek, so that doesn't hurt. I think my favorite part was always the the incredibly unrealistic inventions he would create, most of them pure deus ex machina. His voice actor, Barry Gordon, also did work is several other of my favorite cartoons, including Darkwing Duck and Swat Kats. 


Each of the turtles has a little plush version of their signature weapon, held on with hook and loop tape so they're removable. I think Michelangelo's little nunchucks are my favorite.


Now I just need to make them some little plush pizza for a snack.

The End

Tuesday, October 11, 2011

I Have a Backup Brain in My Butt

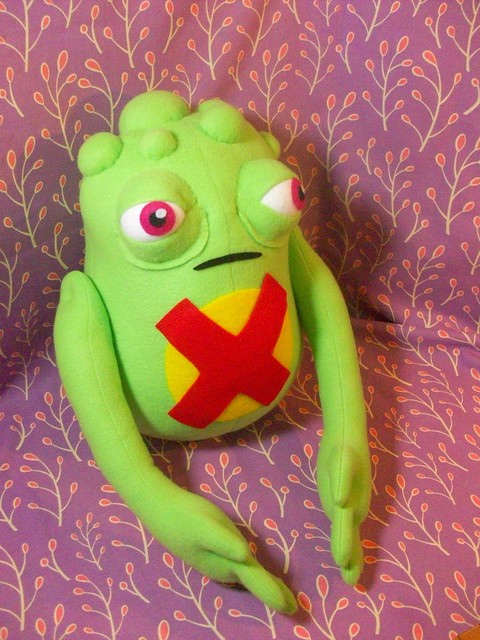
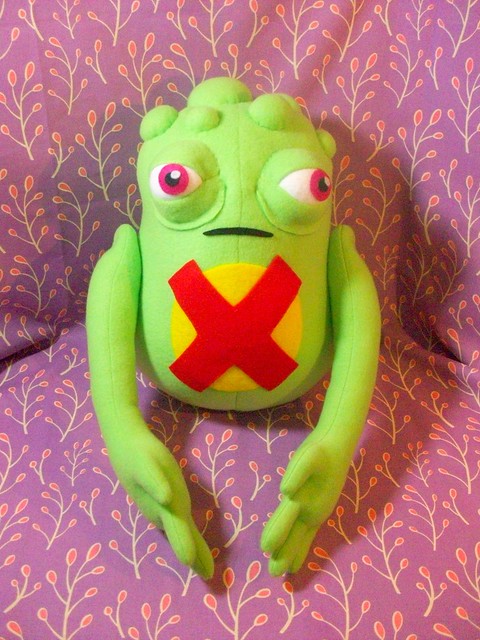
Over the past few weeks I've been getting the last of my custom orders done in order to start getting ready for selling at NC Comicon the first weekend of November. I always get a good selection of interesting charcters with customs, and it seems like I've had an overload of aliens lately...


Oh em gee, I am super happy with how little Doop came out. I think I captured his absolute redonkulousness, along with his vacant stare. Doop is one of those dolls I had way too much fun making. He's about 16" tall and, like all my dollies, has jointed arms. Jointed arms are especially good for flailing while following your boyfriend around the house and repeatedly singing "doop doop doop doop doop doop" until he loses his mind. I think "Nerdy ways to irritate your boyfriend" is so going to be a new blog feature.)


I love his weird, buggy eyeballs. You don't even know.


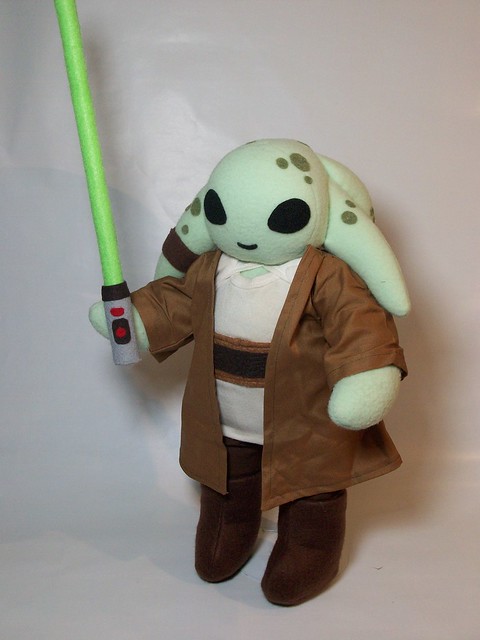
Kit was actually for Stitch Wars Strikes Back at the Bear and Bird Gallery. He didn't sell and I'm totally disappointed to have his adorableness in my house again. Devasted. He's not at all cuddly and loveable and I do not squee girlishly about his head tentacles. (Headacles? That doesn't sound right.) He also did not sit with me and watch the aquatic episodes of Star Wars: The Clone Wars.


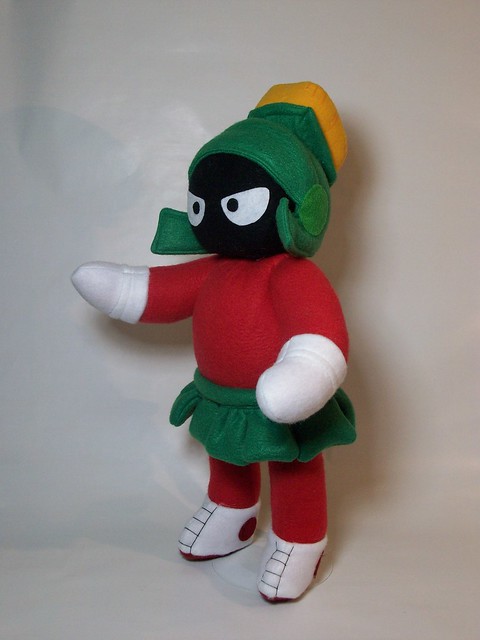
I think Marvin is the most "mainstream" of the alien plush. He looks a little cranky about it.


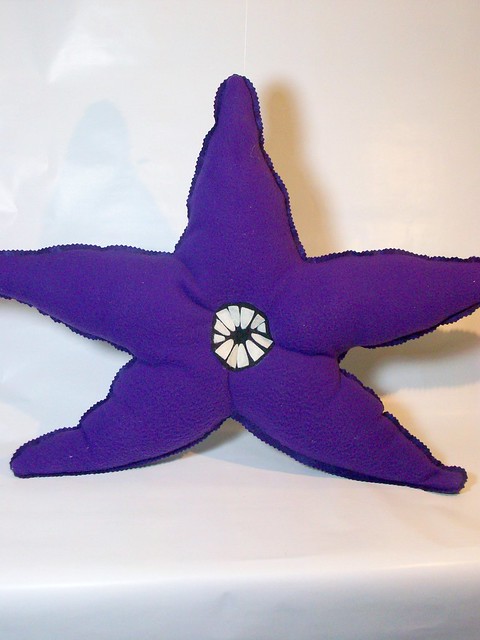
Here's Starro to give you a big hug... and control your brain and subvert your will. But mostly hugs!


Come on, give him a little smooch.

Saturday, September 17, 2011

Nifty Thrifty - Creature from the Year Thrift-Thousand

This week's Nifty Thrifty is a little about the view on the way to the thrift store rather than the thrift store itself.

If I can manage to sneak out of work a little early on Fridays, I take a little stroll to the bus stop and head to the thrift store. I work in a fairly industrialized area, but it still makes for a really nice walk after sitting in an office all day. It was so nice this past Friday that I decided to take a few photos on the way.


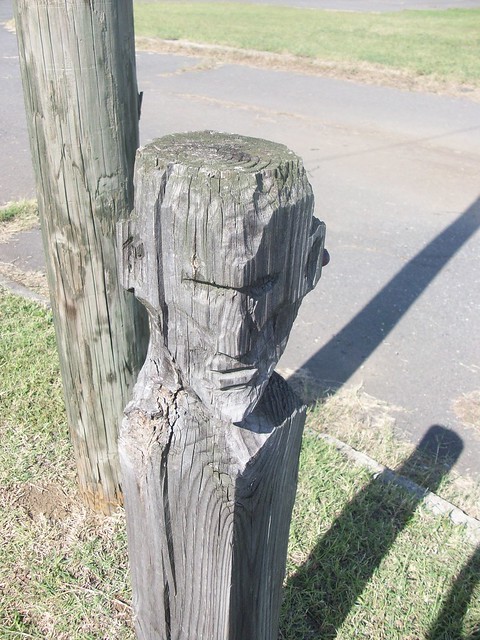
There are two wooden posts on either side of driveway on the way. One is just a normal, weathered wooden post. The other one is this:


Post Guy looks a little quizzical. Perhaps he's curious about why has such a severe flat top.


Once I get to the bus stop, there are several trees to wait under.


The bus stop takes me to the light rail station and then to the thrift store. The stations were I live are each decorated in a different theme. The two I see on the way to the thrift store are not two of my favorites, but I do like one thing. The elevator at one is decorated with a mosaic of reflectors. I love the idea of using not artistic things to make art and the reflectors catch the light really nicely.


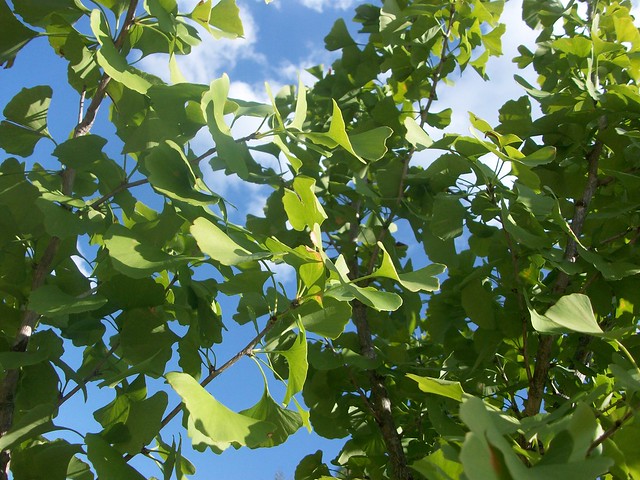
There are also several ginkgo trees on the walk between the light rail station and the thrift store.  Ginkgo leaves are one of my favorite shades of green and the yellow they turn in autumn is just as pretty. They also satisfy my nerdiness because they're really interesting trees. NERD ALERT! The ginkgo is classified in it's own taxonomic classification and is basically a living fossil as it is closely related to species from 200 million years ago. It's thought that wild growing ginkgo trees died out and the tree was saved and continued only by human cultivation. It's nice when humans save something instead of killing it. Also, the Chinese name basically means "tree with the leaves like a duck foot". How awesome is that?

Tuesday, September 13, 2011

Daddy, Why Did You Eat My Fries?

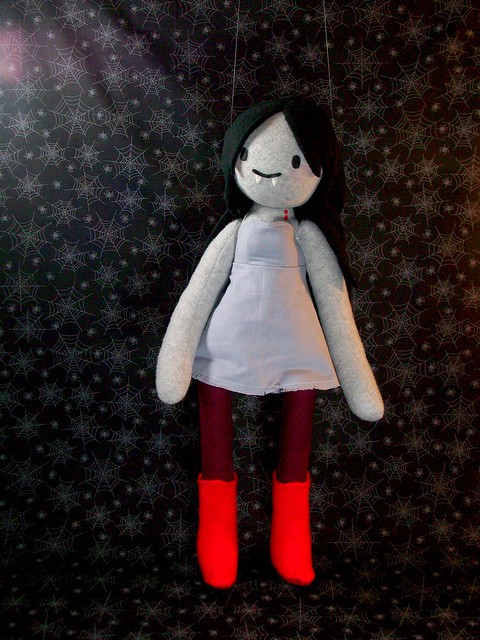
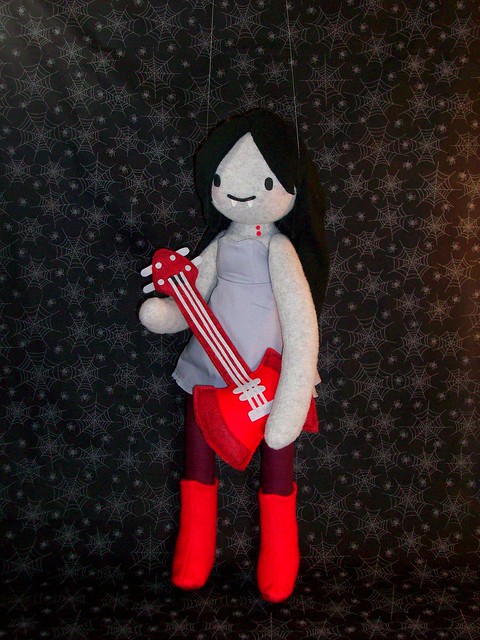
Making Adventure Time plush for other people was super fun (see PB and Lady here and Finn and Jake here). But you know what was even more fun? Making a Marceline for me to keep!


As much as I sew, I rarely get to make things for myself.  Most of what I make is custom orders or for sale at conventions or on my Etsy shop. (Speaking of conventions, I'll be at NC Comicon in November, come see me!) I love sewing for other people and it's a good thing I don't keep everything I make because I would be buried in dolls, but I've been so busy lately and now I'm gearing up for a plush-a-thon in preparation for NC Comicon and the holidays. With all that, I decided to recharge  a littly by making something just for myself.


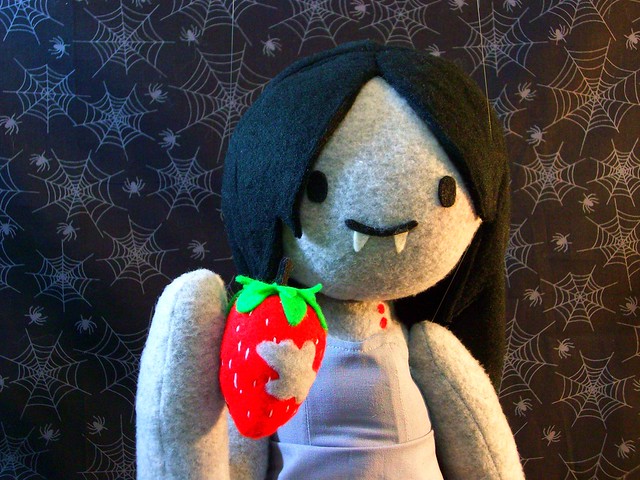
I used the same pattern I drafted for Princess Bubblegum to make Marceline, as well as modifying the dress pattern. I'm really happy with how the jointed necks are working out, so I may be making more characters in this size eventually. Other than the neck modification, which Marceline especially needed to show off her bites, the body is pretty similiar to the body I use for the regular female plush. She stands about 25" tall, most of the height coming from her legs.
I made the clothing removable so I can make her more outfits in the future. One of the little things I like about Adventure Time is that they do bother to make different outfits for the characters. (Finn, being a 13 year old boy, probably does just wear the same clothes all the time.) Her outfit from Henchmen is top of the list if I can find the right fabric for her tights.


She's very cuddly for a vampire queen, but don't tell anybody.

Saturday, September 10, 2011

Nifty Thrifty: Attack of the Thrift People

I've gushed about thrifted textiles before and how wonderful they are if you sew as a source of plentiful and super cheap fabric. Where else can you get five or six yards of lovely fabric for just a few dollars? Thrifted sheets are especially radical if you like full skirts, which I do, because they're large enough that you don't have to do a lot of annoying piecing. Added bonus: they're already hemmed, which means less hemming for you. This is awesome beause hemming sucks. Case in point:


I made this full wrap skirt with contrasting tie waist in about an hour. Don't let anyone tell you it doesn't pay off to be cheap and lazy.

Do you want to make your own? You'll need:
A sheet
Coordinating cotton (about 3/8 of a yard for 45" wide fabric)
Matching thread
Optional: Tape measure


If you have a wrap skirt you like already, you can just use that as a pattern. If not,  all you need to make your own pattern is a tape measure and a little math. (Just a little, I promise.) A wrap skirt is basically just a modified circle skirt, so you only need two measurements: around your waist where you want the skirt to sit and the length you want the skirt. Multiply your waist measurement by 1.5 to accomodate the overlap, because  flashing people on windy days is bad. You'll then half that measurement since your fabric will be folded in half.
For example, if you have a 32" waist:
 32 x 1.5 = 48
48 / 2 = 24
So if you have a 32 inch waist, the top curve of your pattern should be at least 24" long. The shape we're working with is a fourth of a circle, so multiply this measurement by 4 to get the entire circumfrence of the circle.
24 x 4 = 96
Divide this number by 6.28 to find the radius of your cirlce. (You can also use this handy calculator.) Since you have a good amount of overlap, you can round the measurement to the nearest whole number to make measuring easier. We'll  call this final measurement "W".
96 / 6.28 = about 15"
Determine the length you want the skirt and add 1" for your hem. We'll call this measurement "L".

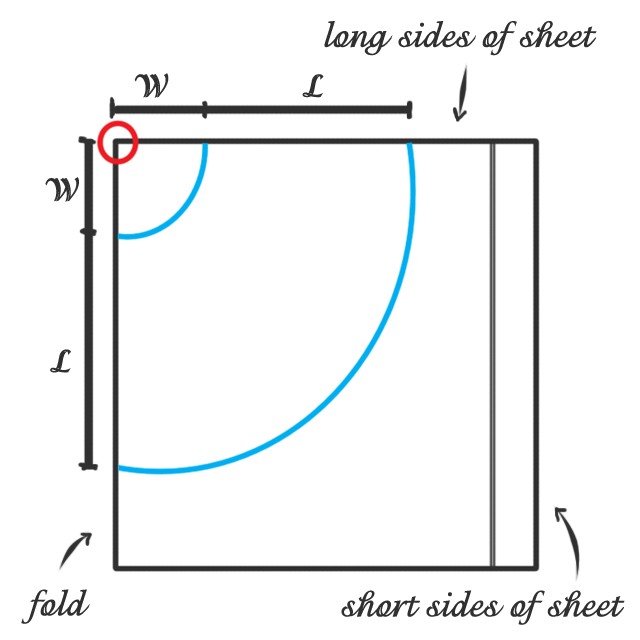
Now we're done with math! Fold your sheet in half long ways, so the top and the bottom meet. Your measurements are going to be made from the top corner of the folded edge (see the red circle in the diagram below). From this corner, measure out "W" and then "L" along both sides. Also measure "W" and "L" from this corner along several points in the middle part of the fabric, and connect to draw the top and bottom of the skirt. Pin and cut through both layers of fabric.


You'll also need to two 5" wide strips of coordinating 45" cotton fabric. The easiest way to do this is to just snip into the selvage (the woven edge on the fabric) and then tear along the length of the fabric. Then measure down 5", make another snip, and tear. Less time cutting and you get nice, straight pieces. Sew the pieces together along one short edge, so you have a piece measuring about 90" x 5". (The strip needs to be long enough to wrap around your waist twice and tie. If two pieces isn't long enough, just attach an additional strip.)


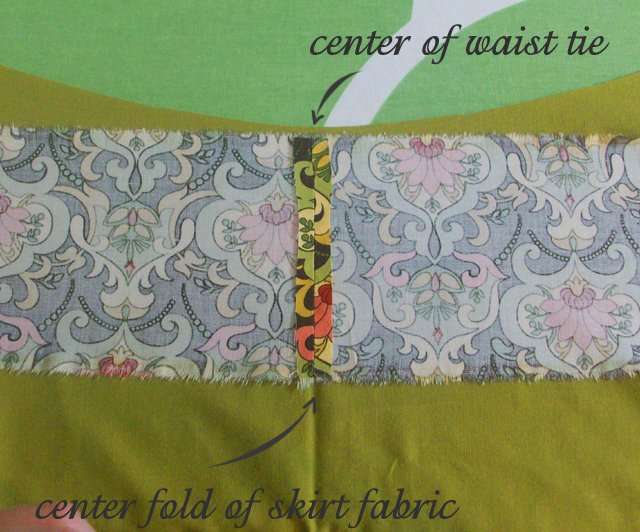
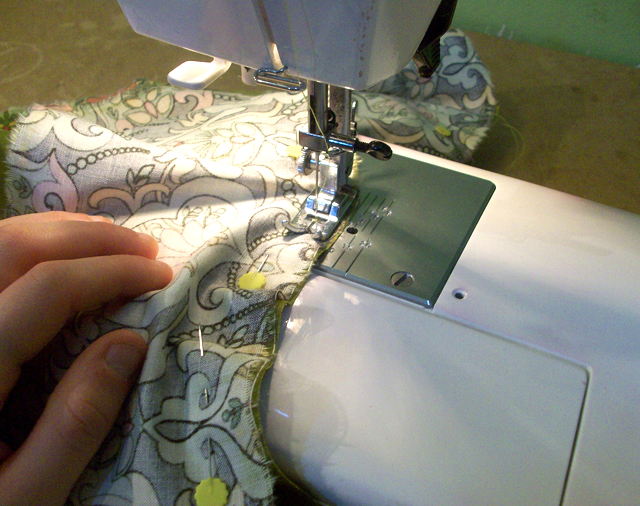
Line up the center of your waistband and the center of the skirt with good sides facing. Pin and sew the waistband to the top edge of the skirt. (The straight sides should already have the sheet's exisisting hem, so no need to bother hemming them.) The waistband will be longer than the top of the skirt; this extra fabric will become the ties.


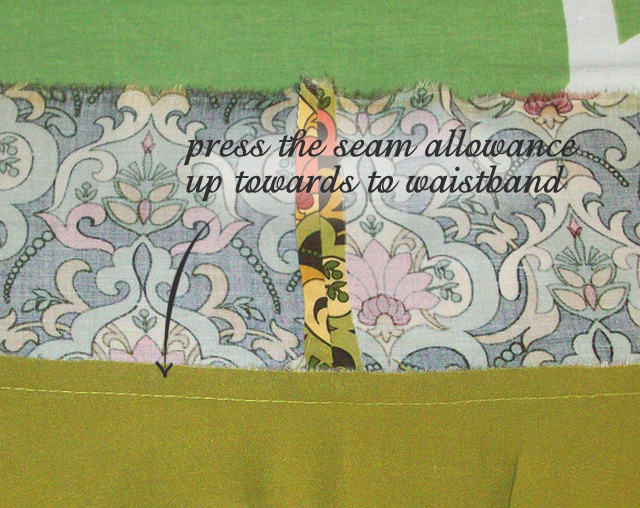
Iron the waistband flat, pressing the seam allowance to the waistband side.


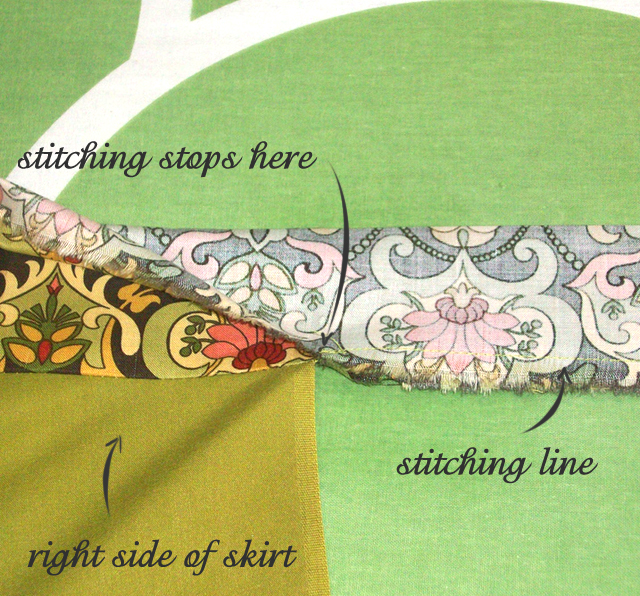
Fold the waistband in half good sides together. Sew along the open edges with a 1/2" seam allowance. Stop at the edge of the skirt.

I chose to make the ends of my ties into a point, but you can do whatever shape you like. Just be sure to cut away any excess fabric.


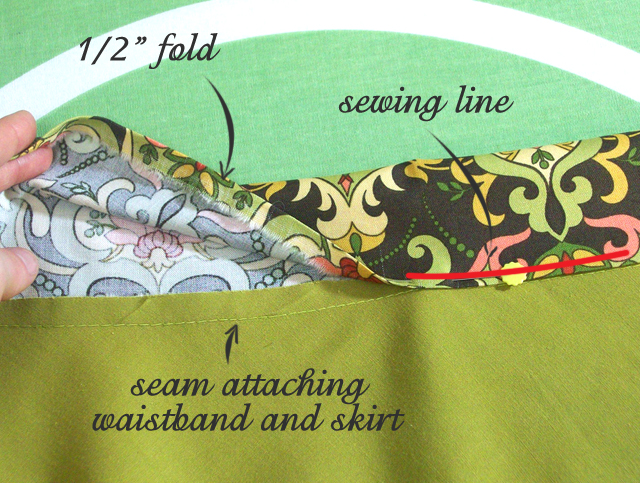
Turn right side out and press. You should have a raw, unstictched edge where the waistband is attached to the skirt along only one side. Press this edge under 1/2". Fold the edge over with the wrong sides of the waistband facing. Line the folded edge up with your waistband seam. Pin in place and topstitch close to edge.

Now just press and stitch a double 1/2" hem along the bottom and you're done!
If there are any questions, I'm happy to help. I'd also to love to see any skirts that are made using this tutorial. If you'd like to share a picture of your skirt you can link in the comments below or email me at kittyzilla@handmadestuffs.com.

Friday, September 9, 2011

Totally Mathmatical!
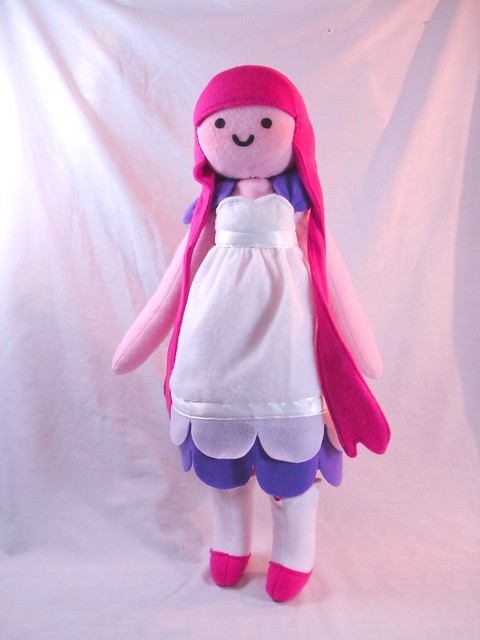
Plush Finn and Jake can't just go galavanting about the land of Ooo all alone, right?


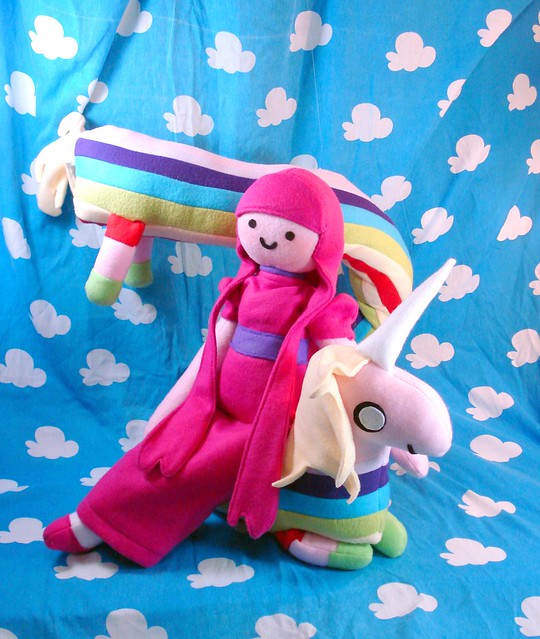
Duh, they have to have PB and Lady Rainicorn to rescue from the Ice King and his terrible fanfiction and explain the difference between Xanoids and Plantoids. Ya ding dong.


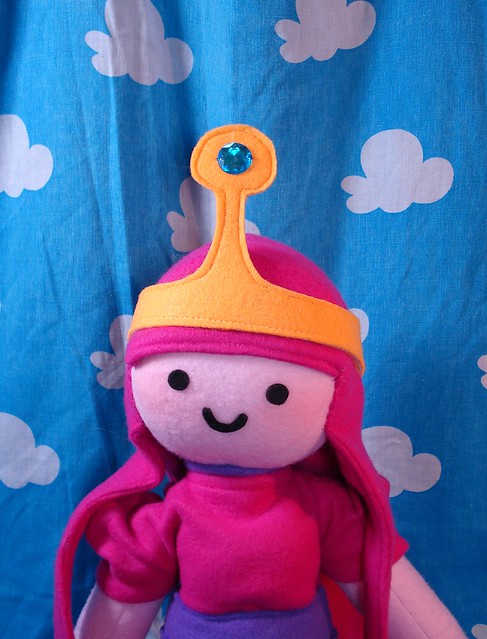
Since PB is a princess, she has to rock out in her sweet crown.


She also has two little dresses, in case she wants to mix it up a little.


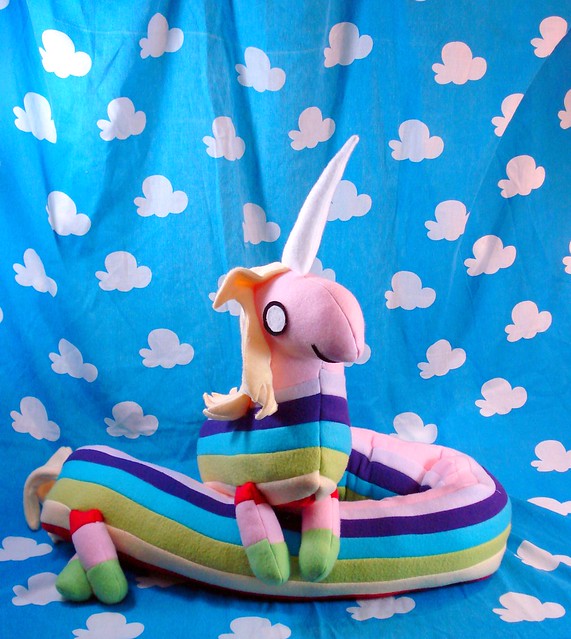
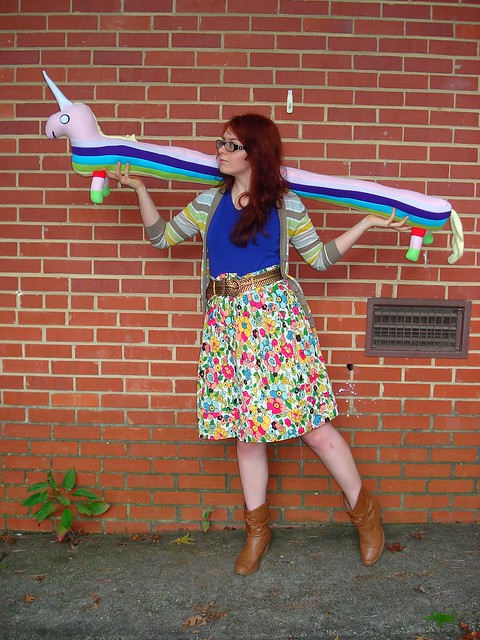
When she has important royal business to attend to, so can ride off on Lady Rainicorn. Who is huge. I'm serious, check this out.


I think she ended up being a little over 60" long. I really didn't intend to make her that hugely long and it took forever to sew all those strips of fleece together. Despite that, I totally want to make another one. Princess Bubblegum is about 25" tall, so a little taller than the plush Finn. She's the first plush I've done with an actual neck that's jointed, and it turned out pretty well.

So far, these have been customs and I'm only able to enjoy them for a short time. These were so fun to make I need to make some for myself. I think I'm going to have to carve out the time to make myself a plush Marceline the Vampire Queen. Is there a cuter idea than a little plush axe bass?

Wednesday, September 7, 2011

Nifty Thrifty: Creature from the Thrift Dimension

I have a Nifty Thrifty post with a tutorial (oh so snazzy) planned for this weekend. In the meantime, have this mug. When you think of beautiful rainbows, don't you think of ... Detroit?

Thursday, September 1, 2011

Good News, Everyone!

Now is the time to do the Almost Through My Commissions Dance. As much as I totally love making customs and all the amazing and weird character requests I get, I haven't had a chance to make what I want to make in MONTHS. I'll be taking a break from customs until early November to prepare for selling at NC Comicon and to get my Etsy shop stocked for the holidays! Keep an eye out for lots of new characters, some old favorites, and other fun things.

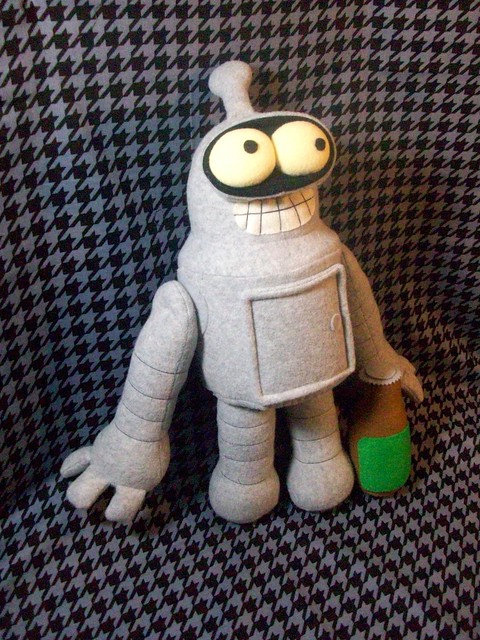
Until then, bask in the amazingness that is Futurama plush.


Bender, as was to be expected, was a pain in the BUTT! I think I went through five versions before I was happy with how he looked. Version four was great except for being about 3" too tall, which I didn't realize until I was most of the way done and set him down next to Fry. Argh.


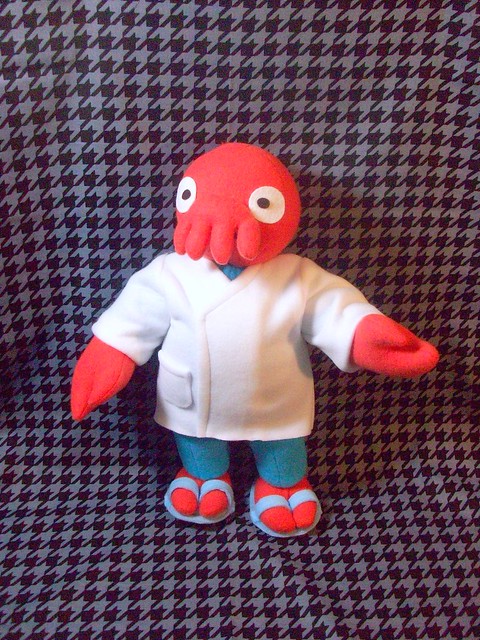
I am so pleased with how little Zoidberg turned out, especially the little sandals and face tentacles. Who knew face tentacles could be so cute? Making him used up the last of this peachy colored fleece though, so I'm on the hunt for more.


Of course you can't have Futurama without little Fry. I love his ridiculous hair. Now I'm going to go try not to think of the episode with Fry's doggie Seymour and .... oh crap now I have to go cry. (The end of the Wikipedia article has links to articles about real dogs who for years for their dead masters. Wikipedia what did I ever do to you?)