

Sunday, December 12, 2010
Stop! Craft Fair Time!
Tuesday, December 7, 2010
Sssseasonssss Greetingssss!
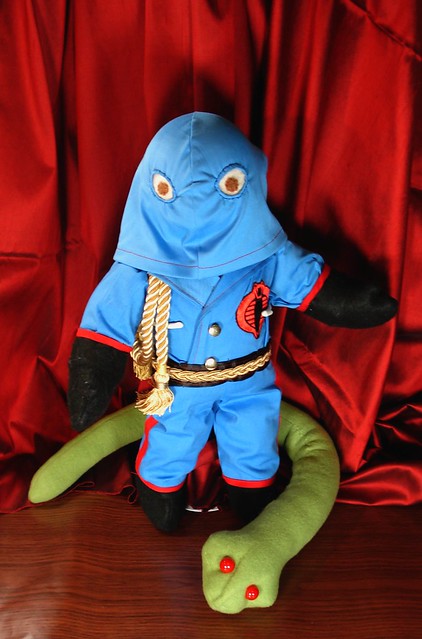
Greetingsss! It isss I, the great Cobra Commander! I have taken over the Handmade SSStuffsss blog usssing my amazing technological ssskillsss to bring you thisss messssssage. It isss imperative that you go to
Cobra!
Monday, December 6, 2010
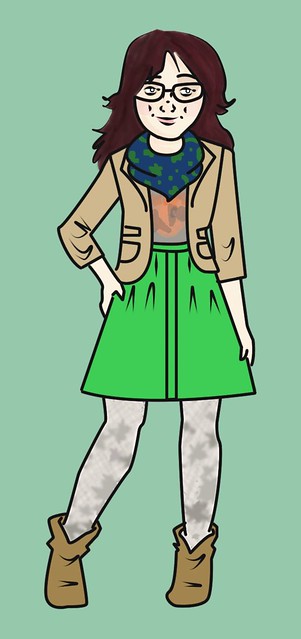
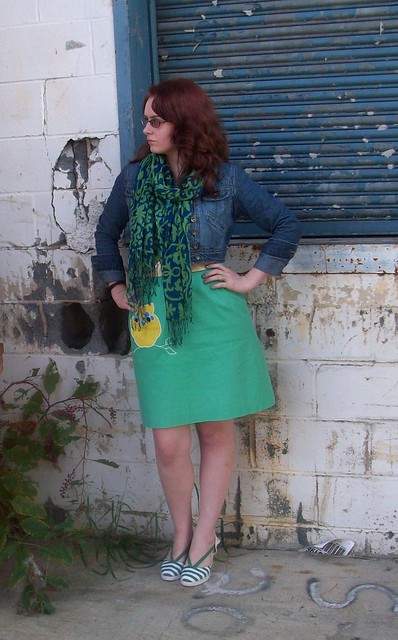
Life is One Bix Mixer
Due to a combination of (disgusting, horrible) wintery weather and working on new combinations for my 30, I am taking a jaunt into Patternville. I need color and layers!

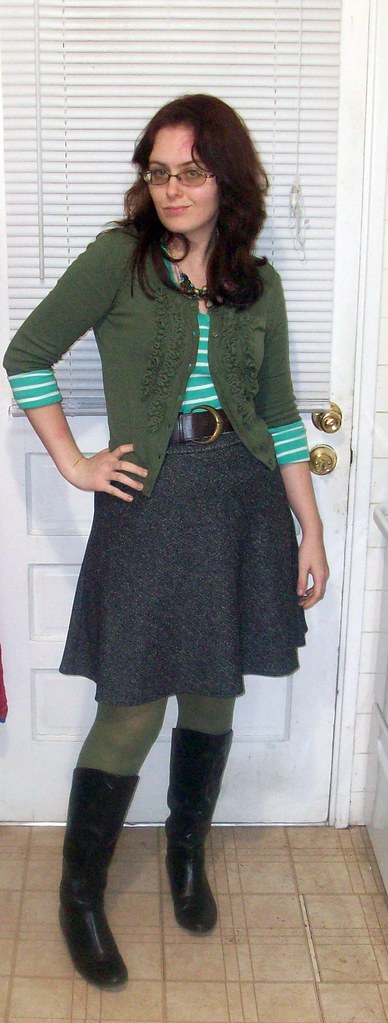
Day 20
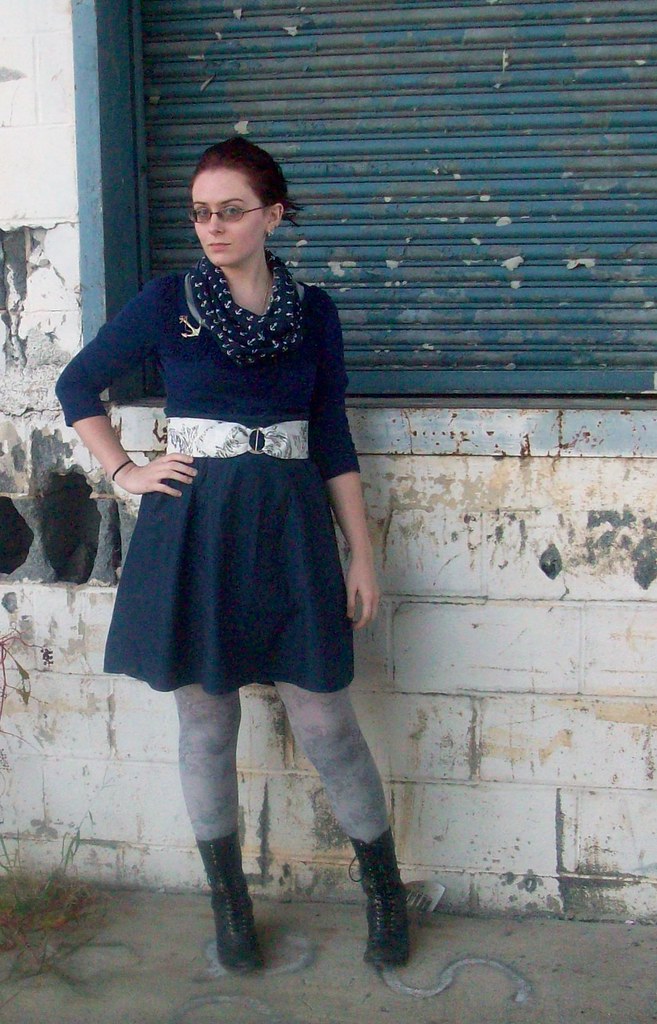
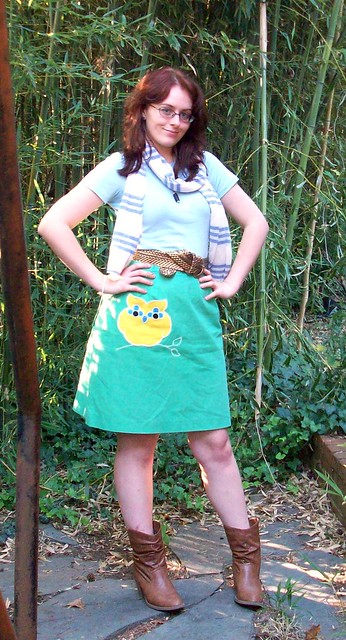
I've mixed this floral skirt with this scarf before, I really love the combo. I wasn't really thinking about two busy florals going together, but they are so similar they looks really nice together. I can also tone down the rest of the outfit with some of the darker colors in the background.

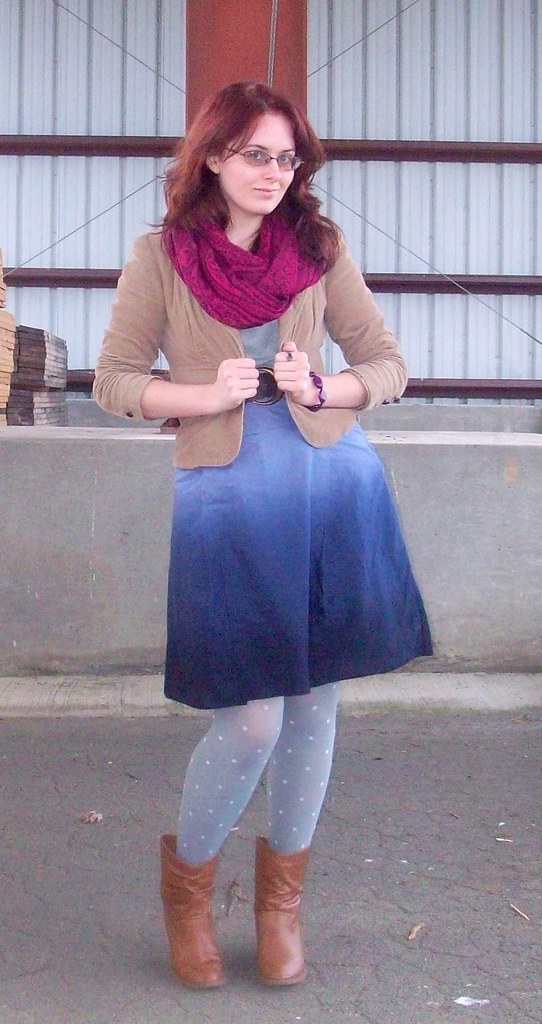
Day 21
Stripes, ombre, and lace-look tights (all the trend with none of the frozen legs). I love this ombre skirt with stripes!
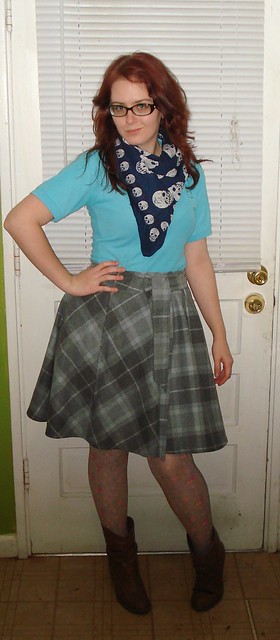
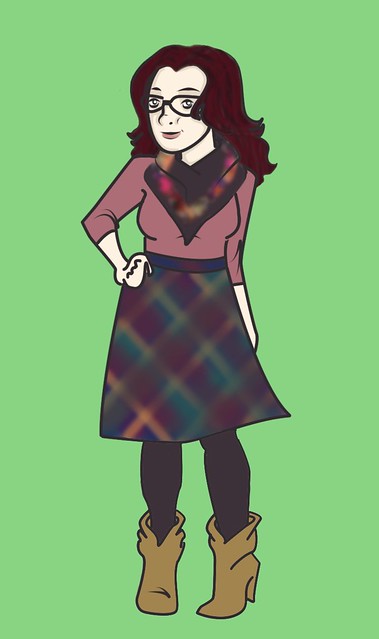
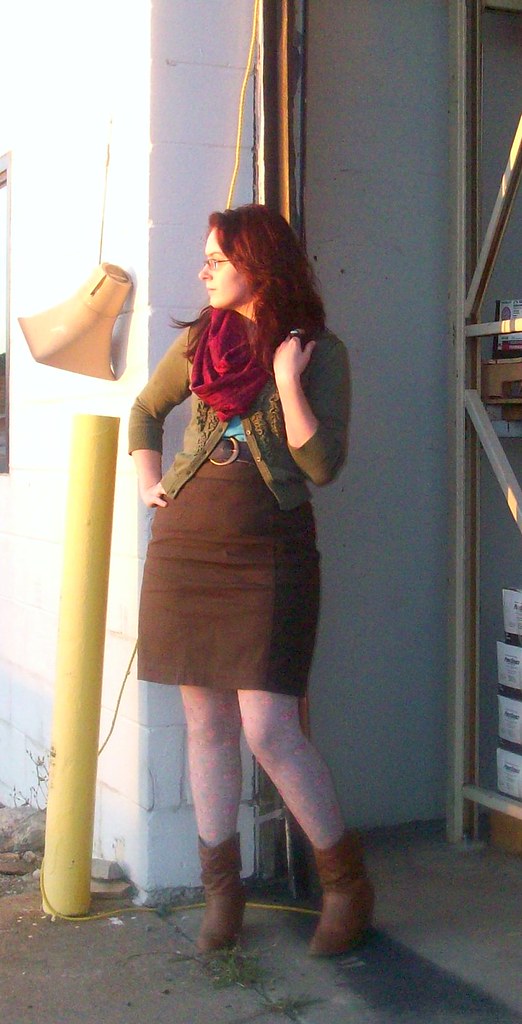
Day 22
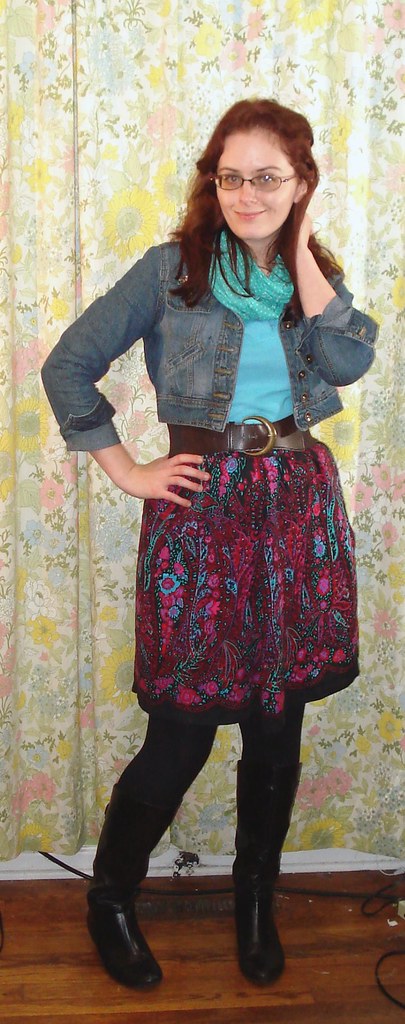
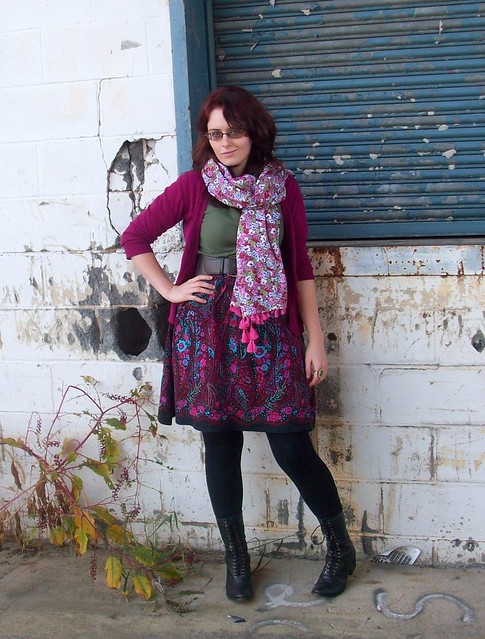
More floral, this time with plaid and skulls, because nothing goes together like a lovely spring day and death. I felt like the blue in all of these was enough to pull them together. There are small blue flowers on the tights, a blue background on the skully scarf, and grey blue in the skirt, and a solid blue skirt. Or more likely I just felt like wearing all this at once and I'm now just making up a reason that I match. I guess we'll never know.
(Also, yes, I am pretty much that white. By January I might glow in the dark.)

Also, I was kind of a naughty little cheater. New glasses are medical, they don't count!
(I really did need them, I haven't had new ones for about five years and my poor little eyes were suffering for it. Please don't judge me!)
One Sketchy Character
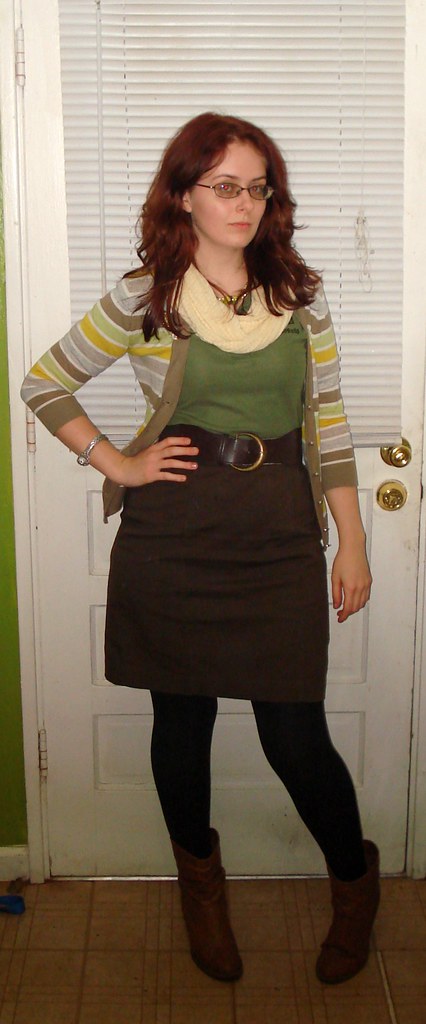
Ok, so I was a little horrible about taking outfit pictures over the Thanskgiving holiday. Luckily, I was feeling a little sketchy...
Day 15
Day 16
Day 17
Day 18
Day 19
Wednesday, November 24, 2010
The Way Things Were
Because I have a rather small waist and what I will affectionately refer to as "birthin' hips", it is an absolute pain to find bottoms. I pretty predominately wear skirts because they are much easier to fit, alter, and when I try them on at the thrift store this is less potential for flashing and therefore less creepy dudes pretending they are deeply interested in the rack of blouses behind me. (My favorite thrift store lacks dressing rooms, which means trying things on under skirts in the aisle. Let no one say I lack class.) These were all skirts that I loved but didn't exactly fit. However, for $2 I am willing to make things fit.
Monday, November 22, 2010
Discovery
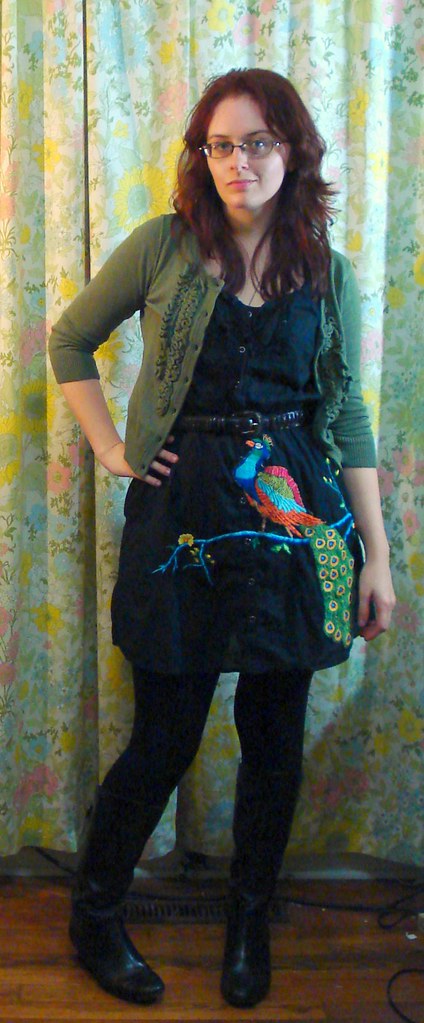
“If a man knew anything, he would sit in a corner and be modest; but he is such an ignorant peacock, that he goes bustling up and down, and hits on extraordinary discoveries.”
-Emerson
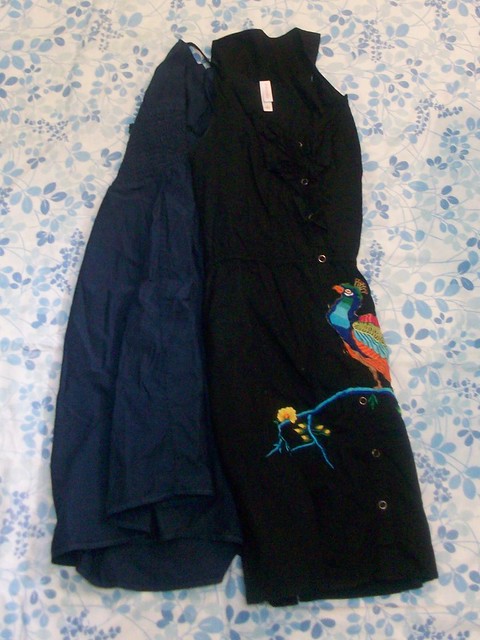
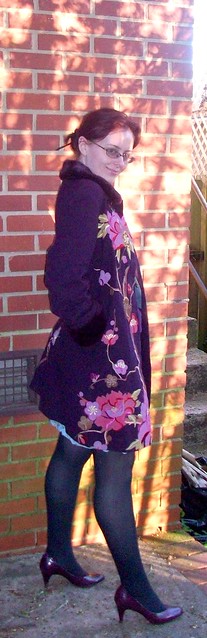
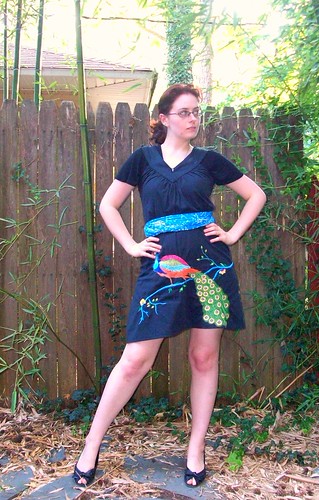
So most people wouldn't classify a thrifted muumuu with a giant peacock as an extraordinary discovery, but man do I love this dress. This isn't actually the original peacock dress, Mr. Peacock was cut from him faded and fraying original home and put on a Target dress. (Alert: thrift stores are a great place to find things to applique!) Once I wear this dress to death, he will probably get moved again if he can manage it.
Tuesday, November 16, 2010
Five and a Tutorial
Day five and it's the first time wearing this recently thrifted skirt. I love the color!

I also love my scarf. Here, look closer and be amazed.

I got the fabric at Cottage Quilts on a trip to Fresno to visit my mom. I love the retro inspired print and it is complemented nicely by the pale blue pompom trim. Feel like making your own?
You need:
- About a 1/2 yard each of a cotton print and a cotton flannel (45" wide)
- Thread
- Scissors -or- a rotary cutter
- Yard stick
- Marking tool
- Optional: About a 1/2 yard of trim
- Measure and cut two 9" strips from each fabric.
- Sew the two strips of cotton print and the two strips of flannel together along one short side, making a long strip of each fabric.
- Fold the fabric in half along the seam and measure out 36". Mark and cut so you will have a 72" strip of each fabric.
- Press the seams open.
- Put your strips good sides together and iron. (I found this helpful since it makes sure that both pieces are flat and the heat also makes the two pieces of fabric cling to each other a bit.) Pin and sew. If you are doing trim on the ends sew along both long sides with a 1/2" seam allowance, leaving the last few inches unsewn as well as about a 2" gap for turning. If you're not bothering with trim, just sew all around, again leaving a 2" gap for turning.
- If you're doing trim: Pull back the top piece of fabric on each end. Line the trim up with the edge of the bottom piece of fabric. Lay the top piece back in place, pin and sew along the sides and ends.
 - Snip the corners of the scarf off (little diagonal cut) close to the stitching line. (This keeps there from being too much bulk in the corners and they will look nicer when right side out.) Turn the scarf right side out through the gap you left. Use a chopstick or something similiar to poke the corners out.
- Press the scarf with a hot iron for nice, crisp edges.
- Topstitch about 1/4" from the edge all around.
P.S. If you want the trim along the long edges, you will need about 4 yards. Put it in between your fabric strips when you sew the sides.
I'd love to see if anybody makes one!
I also love my scarf. Here, look closer and be amazed.
I got the fabric at Cottage Quilts on a trip to Fresno to visit my mom. I love the retro inspired print and it is complemented nicely by the pale blue pompom trim. Feel like making your own?
You need:
- About a 1/2 yard each of a cotton print and a cotton flannel (45" wide)
- Thread
- Scissors -or- a rotary cutter
- Yard stick
- Marking tool
- Optional: About a 1/2 yard of trim
- Measure and cut two 9" strips from each fabric.
- Sew the two strips of cotton print and the two strips of flannel together along one short side, making a long strip of each fabric.
- Fold the fabric in half along the seam and measure out 36". Mark and cut so you will have a 72" strip of each fabric.
- Press the seams open.
- Put your strips good sides together and iron. (I found this helpful since it makes sure that both pieces are flat and the heat also makes the two pieces of fabric cling to each other a bit.) Pin and sew. If you are doing trim on the ends sew along both long sides with a 1/2" seam allowance, leaving the last few inches unsewn as well as about a 2" gap for turning. If you're not bothering with trim, just sew all around, again leaving a 2" gap for turning.
- If you're doing trim: Pull back the top piece of fabric on each end. Line the trim up with the edge of the bottom piece of fabric. Lay the top piece back in place, pin and sew along the sides and ends.

- Press the scarf with a hot iron for nice, crisp edges.
- Topstitch about 1/4" from the edge all around.
P.S. If you want the trim along the long edges, you will need about 4 yards. Put it in between your fabric strips when you sew the sides.
I'd love to see if anybody makes one!
Up a Three, Four the Fun of It
Wednesday I got to escape from my work polos for an extra day due to a class. However, I had to take the rapid transit home and it was really hard not to ride the two extra stops to the thrift store. Like, REALLY hard.
I've been thrift shopping for as long as I can remember. Nearly every Saturday my parents and I would go downtown to our favorite thrift store. My mom and I would call over the aisles to each other, treasures in hand. My dad would wander off to a dusty corner to thumb through books or find embarrassing pants. (He had a penchant for Zoomba-esque pants for much of my childhood.) Saturday morning is just "thrifting time" in my brain.
Speaking of thrifting, both these skirts are thrifted finds.

I frequently have to alter skirts because of my pear shape. The plaid skirt got totally overhauled, it was mid-calf length with a stretched out elastic waistband. It was like the icky sweatpants of skirts, but there was potential that icky sweatpants generally lack. I took off about 8" from the bottom and used the extra fabric to make a more fitted waistband. Much better, right?
Tuesday, November 9, 2010
One in the Hand, Two in the Bag
So day 1 and 2 of 30 are past and I have to say I'm kind of excited so far. I'm sure by day 28 I'll be complaining and having thrift store withdrawals, but for now I'm having fun thinking of different combinations. Although it's limiting to only have 30 items, it also kind of makes it easier to create combinations when pulling from a more limited pool. I am a bit irritated with the work polos, because I think there's a lot more potential without having to have those 5 polo shirts in there for 19 days (yes I figured it). Thank goodness for a nice, long Thanksgiving weekend giving me two extra days of no polos.
Also, have this just because it tickles me. And it's important to be clean and neat, especially when wearing the same clothes for a month.
I included this thrifted skirt before I had done the alterations it needed so I'm glad it turned out alright. I based this outfit around these awesome floral tights I found at Target.
Today I wore my skirt scarf and my dress as a skirt. (Maybe I'll wear my shoes on my head next!) I decided I needed a grey belt when I was picking out my outfit, so I whipped this one up last night.
Monday, November 8, 2010
Sometimes I Am a Genius
I can't believe it took me this long to think of this, actually. I've mentioned that I frequently have to hem up skirts I get at the thrift store. Because everyone else is too tall and not because I am kind of short. Anyway, I got this adorable skirt over the weekend that was perfect except for being about a foot too long. The solution to what I could do with the extra fabric just popped into my head.

The bottom hem leaves on side already finished. All I have to do is press and sew a small hem on the cut edge.

Sunday, November 7, 2010
30 for 30 or How I Learned to Stop Shopping and Love the Remix
What is 30 for 30? Well the rules are easy, pick 30 items and remix them for 30 days. Accessories and coats are free, and I will be taking full advantage as well as posting tutorials for different accessories throughout the month. (Check out the fabric belt tutorial to start.) The second part is no shopping for the entirety of the 30 days, and that is a big part of why I decided to participate.
So why not just stop shopping for a month? I think the addition of being limited to only 30 items will make me really appreciate what I do have, as well push me to make new combinations and more creative. In a month, my whole closet will be new again and I'll have fresh eyes to look for new outfits. Also, I really like shopping and have no will power.
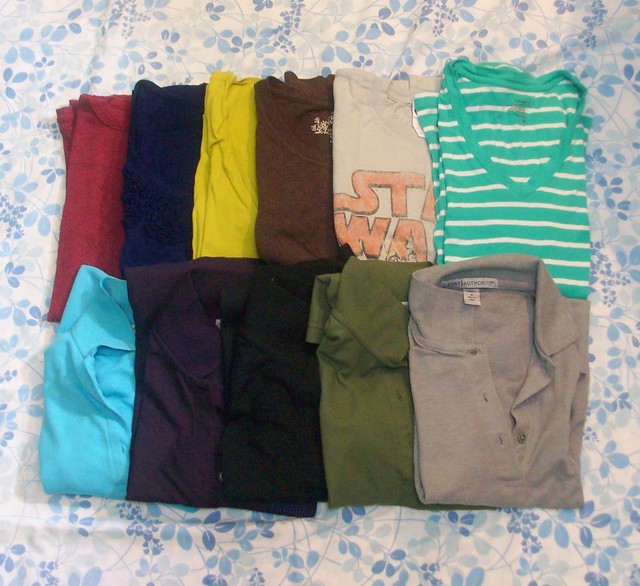
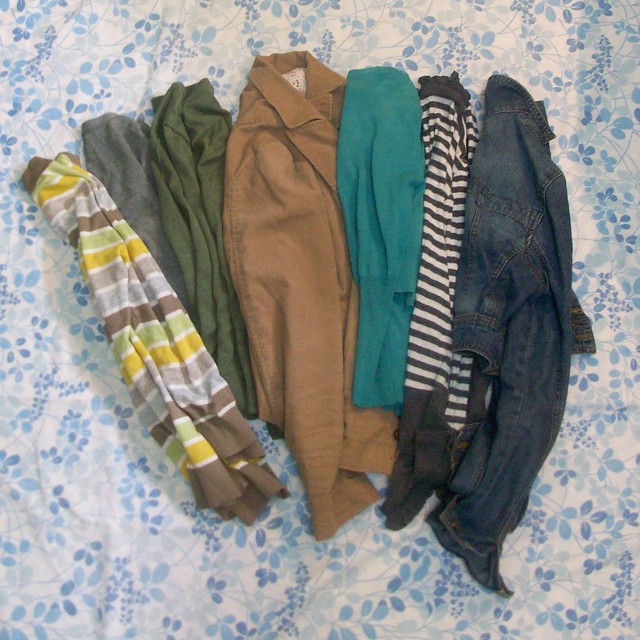
With that, on to my 30 items:

Interested in joining? Truck on over to Kendi Everyday.

So why not just stop shopping for a month? I think the addition of being limited to only 30 items will make me really appreciate what I do have, as well push me to make new combinations and more creative. In a month, my whole closet will be new again and I'll have fresh eyes to look for new outfits. Also, I really like shopping and have no will power.
With that, on to my 30 items:
7 skirts
11 shirts (including 5 stupid work polos)
5 cardigans
1 blazer
1 denim jacket
2 dresses
(You know the peacock dress was going to be in there.)
3 pairs of shoes
Interested in joining? Truck on over to Kendi Everyday.
Wednesday, November 3, 2010
Trust Him, He's From the Future

(There will be more this weekend too!)
Sunday, October 31, 2010
Crafting Personal Style: Cute Bottoms
I bet that's going to get me some interesting site traffic.
I have very much become a skirt person. Skirts are easier to fit and alter, giving me more options when thrifting and making them easier to sew for myself. There are lots of options for silhouettes, which means there are lots of options for finding a style that flatters your body. Do you want your skirt full and flowy, slinky, short and flirty? Look for a scalloped hem, tabs at the waist, bows, and buttons or create them yourself when altering.
So are you ready to start making your own skirts? Burda Style offers free patterns to download. Or blow a little dough on Sew What Skirts, which has some really cute ideas and gives you multiple styles to try. I also saw two skirts I want to try in the MS Encyclopedia of Sewing and Fabric Crafts, (as well as a hundred other projects).
I've been obsessing over this New Look pattern, which is what I used to make the skirt above (and like 5 others). I'd still like to make a few more, I think some flannel plaids would work for the fall and winter. I want to try using some large men's shirts from the thrift store to turn into skirts. There's a good tutorial at Craft Stylish that yields one very cute skirt. There's also a video on Threadbanger that shows you how to make a skirt from shirt sleeves. (The video is for a lighter weight skirt from dress shirts, but you can definitely winterize by using flannel shirts instead.) Alright, now I need to go to the thrift store...
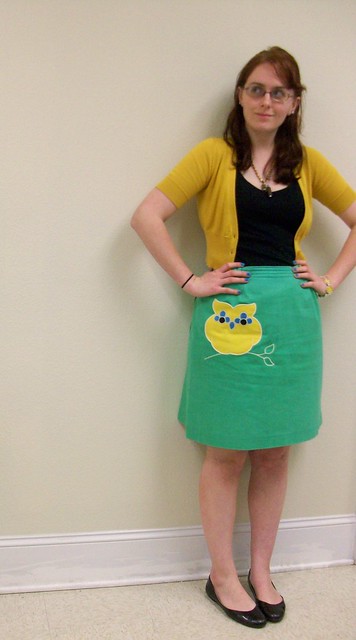
Speaking of thrifting, I found this freaking adorable owl skirt on a thrifting excursion. I think this would be pretty easy to do with some fusible web and a machine that does a satin stitch. (Tutorial time soon I think.)
Let me see how you rock a skirt!
I have very much become a skirt person. Skirts are easier to fit and alter, giving me more options when thrifting and making them easier to sew for myself. There are lots of options for silhouettes, which means there are lots of options for finding a style that flatters your body. Do you want your skirt full and flowy, slinky, short and flirty? Look for a scalloped hem, tabs at the waist, bows, and buttons or create them yourself when altering.
 |
| Thrifted and altered skirt |
I've been obsessing over this New Look pattern, which is what I used to make the skirt above (and like 5 others). I'd still like to make a few more, I think some flannel plaids would work for the fall and winter. I want to try using some large men's shirts from the thrift store to turn into skirts. There's a good tutorial at Craft Stylish that yields one very cute skirt. There's also a video on Threadbanger that shows you how to make a skirt from shirt sleeves. (The video is for a lighter weight skirt from dress shirts, but you can definitely winterize by using flannel shirts instead.) Alright, now I need to go to the thrift store...
Speaking of thrifting, I found this freaking adorable owl skirt on a thrifting excursion. I think this would be pretty easy to do with some fusible web and a machine that does a satin stitch. (Tutorial time soon I think.)
Let me see how you rock a skirt!
Tuesday, October 19, 2010
Crafting Personal Style: Shirt of a Different Color

Despite my whinging, the solid polo actually doesn't not work with my style. My modus operandi tends to be insanely patterned thing + slightly less patterned thing + solid thing. Or alternatively incredibly patterned thing + several solid things that may or may not go with patterned thing.
If done correctly, this is actually a great way to build a wardrobe or work on refining your personal style. You can spend a little more on basics that fit well and will get a lot of wear, or special items that really capture your style. Look for jeans that fit well, an awesome pencil skirt, a fitted blouse, or a great structured jacket, or comfy tees in fun colors. Then you can add trendy or patterned things as you please for experimentation purposes. Thrift stores are a great place to find unusual items for little money. Since trends tend to cycle, you can also find items with a current feel for much less money. (Have I mentioned I love thrift stores? I feel like I should mention I looooooove thrift stores.) For example:
If you want to work with what you have, consider the effect of color and pattern to make things look different and new. Pinstripes can look sophisticated with a solid blazer or funky with a fun floral. (I am awesome at alliteration, ha!) Animal print can look timeless as a scarf with a dark pencil skirt or young and fun with bright green boots and light jeans.
Pattern mixing is one of my favorite parts of sewing and dressing. It might seem daunting, but starting with some basic rules can help keep you from looking like you fell in your closet and wore what stuck. (Not that there's anything wrong with that.) Vary the scale and type of pattern. It's pretty hard to go wrong by pairing an organic pattern like a floral or paisley and a smaller scale geometrical pattern like a stripe or check. Small, subtle pattern like dots or pinstripes are great for adding a little interest to solids and for mixing with bolder patterns. Pairing a small scale stripe with a floral is one of my favorite combos. Don't think you have to be matchy, try finding a main pattern with several colors and maybe pulling a polka dot in one color and a stripe in two others. (Or just wear all plaid like Kasmira, this lady is seriously masterful with pattern mixing.) Try things together that you wouldn't think of, they may end up looking great together. Throw some coordinating solids together, like several different shades of sherberty colors or jewel tones. ColourLovers.com has a ton of inspiring color combos available to browse and search.
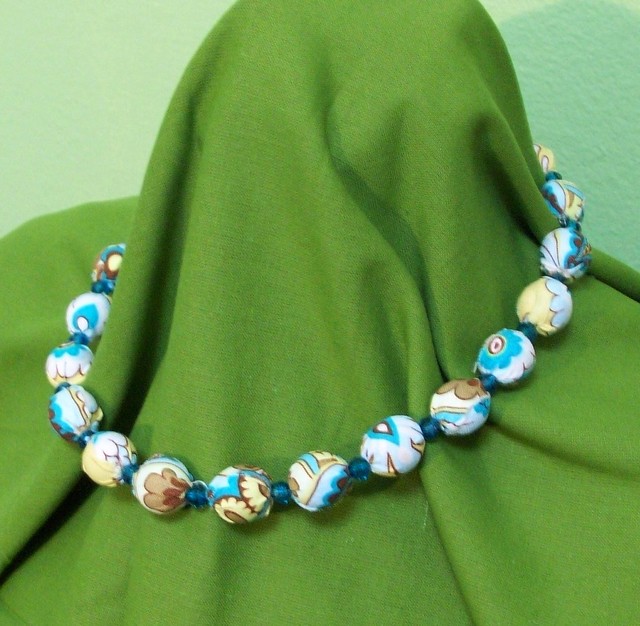
Interested in pattern? Small bits of pattern are a good jumping off point. If you're fond of your waist, you might try the belt tutorial I just posted. This takes pretty minimal sewing skills and even less fabric. Fabric cuffs are also simpe to make; sew together two pieces of fabric large enough to go around your wrist with some overlap then turn and add a closure. Mer Mag has an awesome scarf tutorial. Tights are also a good way to bring in pattern. Now is a great time to hit discount stores like Ross or TJ Maxx for tights, and Target has some great colors and patterns for $5. Make your own patterns by tie dying white cotton tights or printing your own design. Find some cute scraps and a bit of elastic and make this simple headband. The Moda Bake Shop has instructions for a necklace made from fabric beads. I've made one and it's very simple and fun (also a great way to use up teeny scraps).
The weather is getting chilly and gray, I want to see how you bring pattern and color into your life!
The weather is getting chilly and gray, I want to see how you bring pattern and color into your life!
Tuesday, October 12, 2010
Fabric Belt

Before you start, measure around your waist where you want the belt to sit. Add about 10 inches. Then gather up your supplies. You will need:

- Two strips of fabric measuring 4" wide by the length you determined. (If your fabric isn't long enough, just piece two bits together.)
- Fusible interfacing 3" wide by the length you determined less 1". (For example, if the length you determined is 40", you want to cut your fusible at 39".)
- A wooden or plastic ring. I used a shower curtain ring that came in a pack of 12 for like $1.50. Purse hardware or decorative belt buckles would also work well.
- Big huge snaps
- Matching thread
- Monster needle
- Marker
- Iron
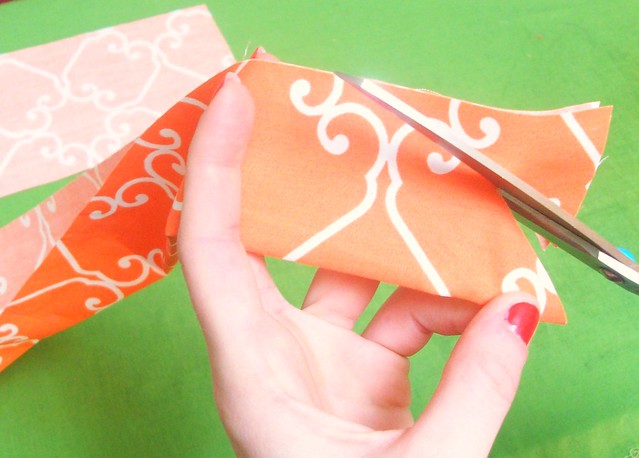
Fold your fabric in half widthwise and trim a sort of leafy shaped point. The shape is totally up to you, this will be the little fold over bits on the ends. Use the first one as a template for the ends of both fabric strips and the fusible interfacing.
Center the interfacing onto the back side of one of the fabric strips and iron in place. Pin the fabric strips right sides together and sew together with a 1/2" seam, leaving a 2" gap for turning. (Sew right along the edge of the interfacing so it is not caught in your seam.)

Before turning, trim down the seam allowance on both tips. This will keep there from being too much bulky fabric. Turn right side out through the gap. Use a chopstick to push the seams out from the inside and press the edges with a hot iron. (It helps to kind of roll the edges in between your fingers before pressing.)
Once the belt is all pressed and pretty, wrap it around your waist and feed the ends through your ring, folding the belt back on itself. (Look at the picture at the top for reference.) Play with it until your sides are even, mark where each tip ends with a pin and remove from the ring. Fold one side over the ring, matching the end to where you marked with the pin.

Make several small stitches on each side, trapping the ring. (Since you are going through four layers of fabric and 2 of interfacing, this is where a monster needle comes in handy. I use an upholstry needle.)
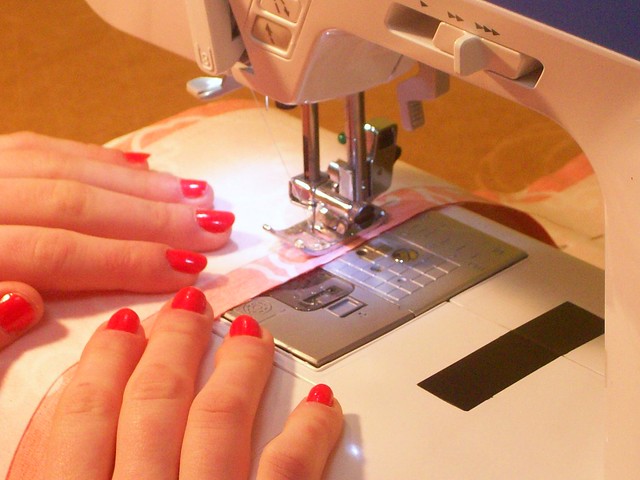
Fold the other side of your belt over the ring, making sure your flaps are on the same side. Mark where the fabric folds over the ring and measure about 1" away. Stitch the male part of the snap in place (the one with the sticking out part in the middle), centering on the fabric.
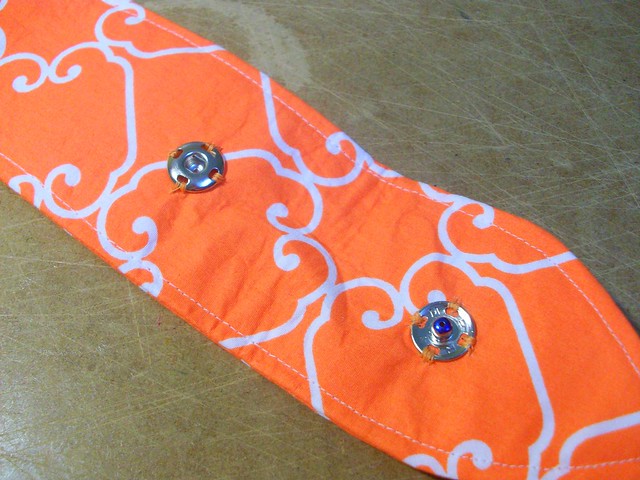
Color the sticky out part of the snap with a marker. (See how mine is blue?) While the ink is still wet, fold over and mark where the other side of the snap should go. Stich the other side of the snap in place. To take the belt on and off, just wrap pull through the ring and and snap.
I want to try one with some trim around the edges; I think ric-rac would be really cute. You can also sew a cute button and buttonhole instead of snaps.
Thursday, September 16, 2010
Crafting Personal Style: Work What You've Got
The cheapest way to freshen up your wardrobe is to just change what you already own. Even the cutest peices can start feeling a little stale and boring when you've worn them fifty times. Altering and embellishing can make something old feel and look new (or at least new to you).
A little altering can make an amazing difference. Simple alterations like hemming or adjusting fit are pretty easy if you have some basic sewing skills. Marisa at New Dress a Day makes quick and easy alterations and turns $1 horror shows into adorable outfits.
The shirts my job provided were a lovely square shape, so the first order of business was to take them in a bit. (Check out this tutorial at Fashionomics.) Several of my thrfted skirts are altered too. I've found some great ones for just a few bucks and all they needed to be cute was a few inches taken off the hem. My favorite dress started life as a $2.50 thrifted kaftan. (Side note: dresses with giant peacocks on them are incredibly versatile, don't let anyone tell you differently.)

If the fit isn't the issue so much as terminal boringness then it's time to embellish. I figure the best way to distract from a boring polo shirt is with interesting and unique pieces. I can exercise my creativity and save some money towards the start up costs for my future small business (where I can wear what I want). Need some ideas?
Add some details to your basics. Plain blazers are plentiful and cheap (about $5) at thrift stores, and I'm loving blazers with contrast edging.
 How easy would this be to do with some bias tape? I have a cord blazer that I think will look awesome with some scholarly elbow patches and floral print edging. Grab a bias tape maker and get to work! Bias tape could also look cute along the edge of a skirt, around the arms of a blouse, or to create stripes on a jacket sleeve or pant leg.
Appliques are an easy way to add character and interest. Most craft stores will have a selection on iron on embroidered patches. Check out Etsy for some more original options. I found these these awesome skull patches. If you want a little more glitz, go for beaded or lace appliques. Check if your local fabric store has a bridal section, or look online. I already found some I want at sequinappliques.com, including a sequin stegosaurus.

Also look at thrift stores for uniforms with patches or old formal dresses with applique pieces, the whole piece may cost you the same as a new patch would. If you want to be able to change it up a little, sew or glue a pin back or two on. (This will extend the life of you applique too, since you can take them off to wash your clothes.)
New buttons, one of the cheapest and quickest ways to change the look of an item of clothing. . If you need some instruction on sewing buttons, check out this video from Threadbanger. Take your garment with you, or snip off one of the old buttons to take with you for size. I found some disgustingly cutesy little buttons on Etsy from sellers Mr Walrus and Thai Fab Shop. You can also make your own buttons with a covered button kit and some cute fabric. I made a little skull button with a teeny piece of my embroidery.

Find yourself a stud or two. A lot of interesting looks seem to be all about mixing cute and masculine, and I'm all about metal studs for the perfect punky touch. You can grab some at studsandspikes.com, a bag of 25 will run you less than $5.00. (You can grab a kit to set them, but I distinctly remember just making do with pliers as a "rebellious" teenager.) I'm thinking floral wristbands with metal studs? Studs and chains from the hardware store could add some interest to plain boots.
Embroidery is easy, cheap, and you can even take it with you to work as a little lunchtime craft therapy. Grab a hoop and head over to Sublime Stitching or Mr X Stitch (where you can get my Internet meme embroidery patterns, by the way). You can also grab free patterns at Needlecrafters. Beads or charms would make it even more interesting.
I'd love to hear your ideas for embellishment.
A little altering can make an amazing difference. Simple alterations like hemming or adjusting fit are pretty easy if you have some basic sewing skills. Marisa at New Dress a Day makes quick and easy alterations and turns $1 horror shows into adorable outfits.
The shirts my job provided were a lovely square shape, so the first order of business was to take them in a bit. (Check out this tutorial at Fashionomics.) Several of my thrfted skirts are altered too. I've found some great ones for just a few bucks and all they needed to be cute was a few inches taken off the hem. My favorite dress started life as a $2.50 thrifted kaftan. (Side note: dresses with giant peacocks on them are incredibly versatile, don't let anyone tell you differently.)
If the fit isn't the issue so much as terminal boringness then it's time to embellish. I figure the best way to distract from a boring polo shirt is with interesting and unique pieces. I can exercise my creativity and save some money towards the start up costs for my future small business (where I can wear what I want). Need some ideas?
Add some details to your basics. Plain blazers are plentiful and cheap (about $5) at thrift stores, and I'm loving blazers with contrast edging.
 How easy would this be to do with some bias tape? I have a cord blazer that I think will look awesome with some scholarly elbow patches and floral print edging. Grab a bias tape maker and get to work! Bias tape could also look cute along the edge of a skirt, around the arms of a blouse, or to create stripes on a jacket sleeve or pant leg.
Appliques are an easy way to add character and interest. Most craft stores will have a selection on iron on embroidered patches. Check out Etsy for some more original options. I found these these awesome skull patches. If you want a little more glitz, go for beaded or lace appliques. Check if your local fabric store has a bridal section, or look online. I already found some I want at sequinappliques.com, including a sequin stegosaurus.

Also look at thrift stores for uniforms with patches or old formal dresses with applique pieces, the whole piece may cost you the same as a new patch would. If you want to be able to change it up a little, sew or glue a pin back or two on. (This will extend the life of you applique too, since you can take them off to wash your clothes.)
New buttons, one of the cheapest and quickest ways to change the look of an item of clothing. . If you need some instruction on sewing buttons, check out this video from Threadbanger. Take your garment with you, or snip off one of the old buttons to take with you for size. I found some disgustingly cutesy little buttons on Etsy from sellers Mr Walrus and Thai Fab Shop. You can also make your own buttons with a covered button kit and some cute fabric. I made a little skull button with a teeny piece of my embroidery.

Find yourself a stud or two. A lot of interesting looks seem to be all about mixing cute and masculine, and I'm all about metal studs for the perfect punky touch. You can grab some at studsandspikes.com, a bag of 25 will run you less than $5.00. (You can grab a kit to set them, but I distinctly remember just making do with pliers as a "rebellious" teenager.) I'm thinking floral wristbands with metal studs? Studs and chains from the hardware store could add some interest to plain boots.
Embroidery is easy, cheap, and you can even take it with you to work as a little lunchtime craft therapy. Grab a hoop and head over to Sublime Stitching or Mr X Stitch (where you can get my Internet meme embroidery patterns, by the way). You can also grab free patterns at Needlecrafters. Beads or charms would make it even more interesting.
I'd love to hear your ideas for embellishment.
Subscribe to:
Posts (Atom)