I've gushed about thrifted textiles
before and how wonderful they are if you sew as a source of plentiful and super cheap fabric. Where else can you get five or six yards of lovely fabric for just a few dollars? Thrifted sheets are especially radical if you like full skirts, which I do, because they're large enough that you don't have to do a lot of annoying piecing. Added bonus: they're already hemmed, which means less hemming for you. This is awesome beause hemming sucks. Case in point:
I made this full wrap skirt with contrasting tie waist in about an hour. Don't let anyone tell you it doesn't pay off to be cheap and lazy.
Do you want to make your own? You'll need:
A sheet
Coordinating cotton (about 3/8 of a yard for 45" wide fabric)
Matching thread
Optional: Tape measure
If you have a wrap skirt you like already, you can just use that as a pattern. If not, all you need to make your own pattern is a tape measure and a little math. (Just a little, I promise.) A wrap skirt is basically just a modified circle skirt, so you only need two measurements: around your waist where you want the skirt to sit and the length you want the skirt. Multiply your waist measurement by 1.5 to accomodate the overlap, because flashing people on windy days is bad. You'll then half that measurement since your fabric will be folded in half.
For example, if you have a 32" waist:
32 x 1.5 = 48
48 / 2 = 24
So if you have a 32 inch waist, the top curve of your pattern should be at least 24" long. The shape we're working with is a fourth of a circle, so multiply this measurement by 4 to get the entire circumfrence of the circle.
24 x 4 = 96
Divide this number by 6.28 to find the radius of your cirlce. (You can also use
this handy calculator.) Since you have a good amount of overlap, you can round the measurement to the nearest whole number to make measuring easier. We'll call this final measurement "
W".
96 / 6.28 = about 15"
Determine the length you want the skirt and add 1" for your hem. We'll call this measurement "L".
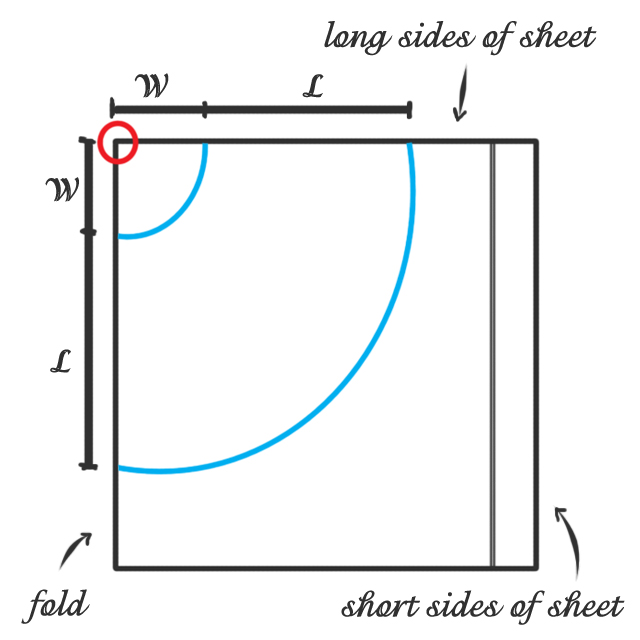
Now we're done with math! Fold your sheet in half long ways, so the top and the bottom meet. Your measurements are going to be made from the top corner of the folded edge (see the red circle in the diagram below). From this corner, measure out "W" and then "L" along both sides. Also measure "W" and "L" from this corner along several points in the middle part of the fabric, and connect to draw the top and bottom of the skirt. Pin and cut through both layers of fabric.
You'll also need to two 5" wide strips of coordinating 45" cotton fabric. The easiest way to do this is to just snip into the selvage (the woven edge on the fabric) and then tear along the length of the fabric. Then measure down 5", make another snip, and tear. Less time cutting and you get nice, straight pieces. Sew the pieces together along one short edge, so you have a piece measuring about 90" x 5". (The strip needs to be long enough to wrap around your waist twice and tie. If two pieces isn't long enough, just attach an additional strip.)
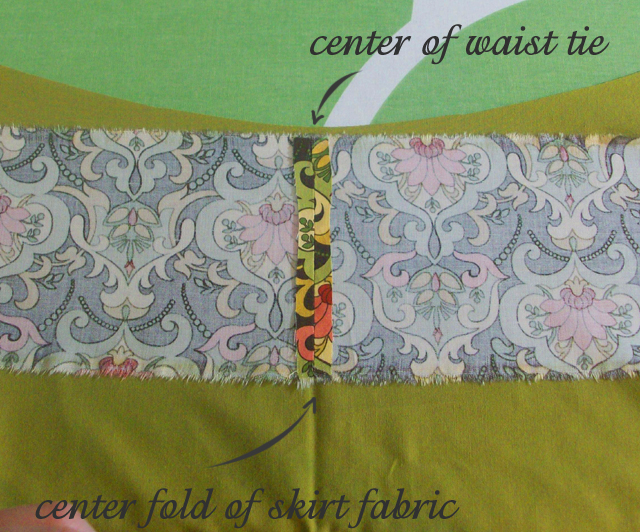
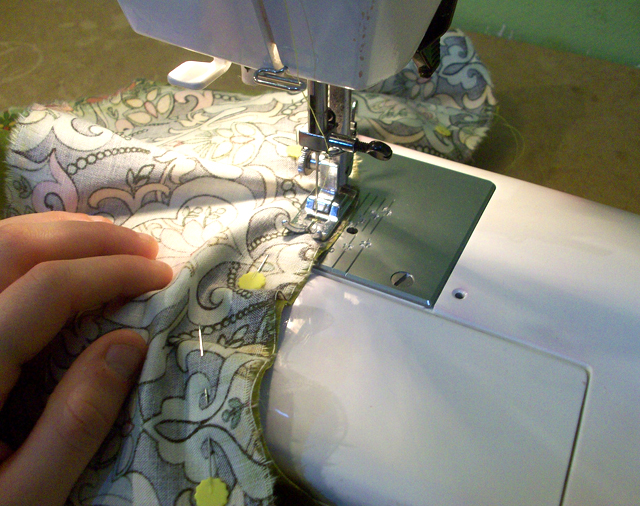
Line up the center of your waistband and the center of the skirt with good sides facing. Pin and sew the waistband to the top edge of the skirt. (The straight sides should already have the sheet's exisisting hem, so no need to bother hemming them.) The waistband will be longer than the top of the skirt; this extra fabric will become the ties.
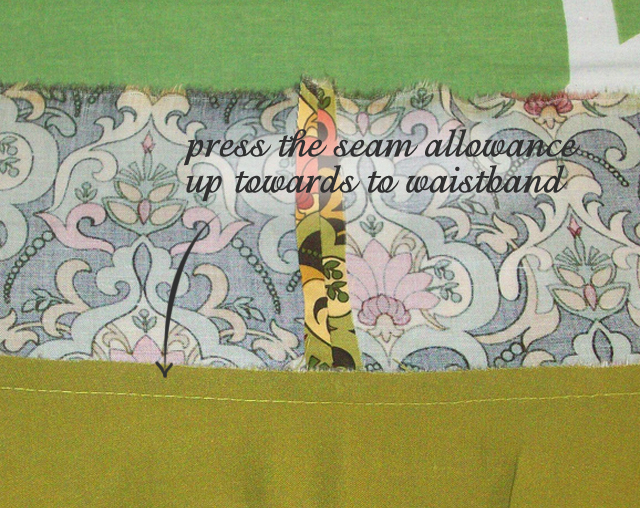
Iron the waistband flat, pressing the seam allowance to the waistband side.
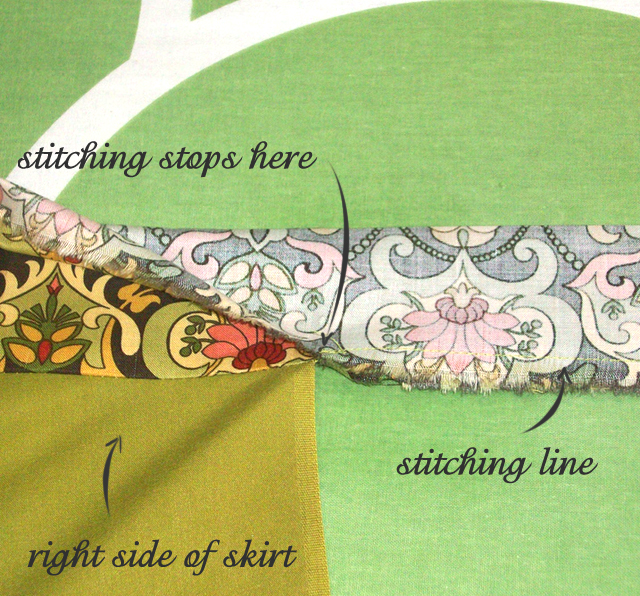
Fold the waistband in half good sides together. Sew along the open edges with a 1/2" seam allowance. Stop at the edge of the skirt.
I chose to make the ends of my ties into a point, but you can do whatever shape you like. Just be sure to cut away any excess fabric.
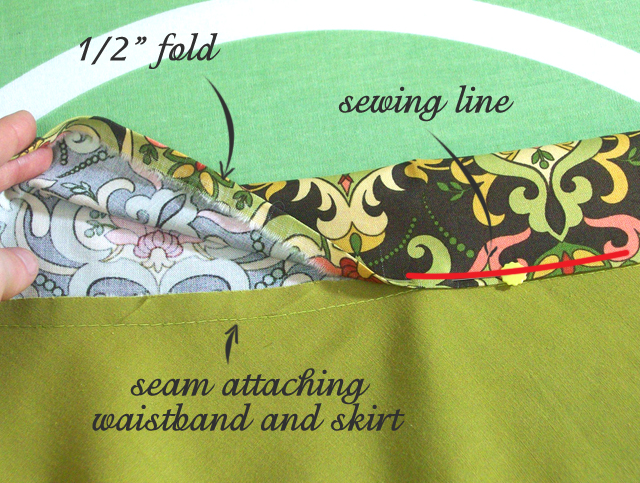
Turn right side out and press. You should have a raw, unstictched edge where the waistband is attached to the skirt along only one side. Press this edge under 1/2". Fold the edge over with the wrong sides of the waistband facing. Line the folded edge up with your waistband seam. Pin in place and topstitch close to edge.
Now just press and stitch a double 1/2" hem along the bottom and you're done!
If there are any questions, I'm happy to help. I'd also to love to see any skirts that are made using this tutorial. If you'd like to share a picture of your skirt you can link in the comments below or email me at kittyzilla@handmadestuffs.com.
