Sunday, October 31, 2010

Crafting Personal Style: Cute Bottoms

I bet that's going to get me some interesting site traffic.

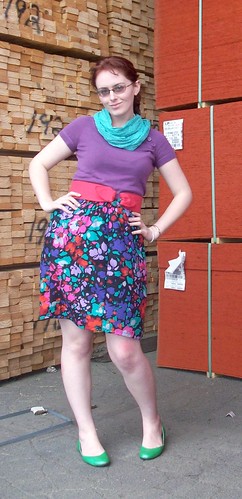
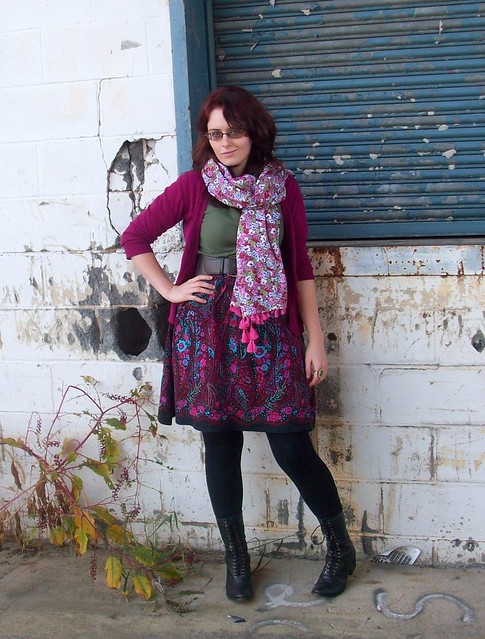
I have very much become a skirt person. Skirts are easier to fit and alter, giving me more options when thrifting and making them easier to sew for myself. There are lots of options for silhouettes, which means there are lots of options for finding a style that flatters your body. Do you want your skirt full and flowy, slinky, short and flirty? Look for a scalloped hem, tabs at the waist, bows, and buttons or create them yourself when altering.

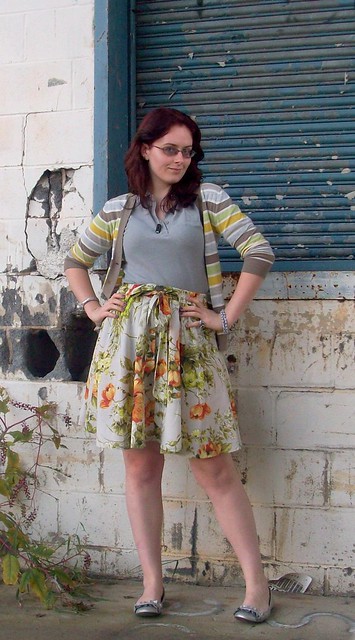
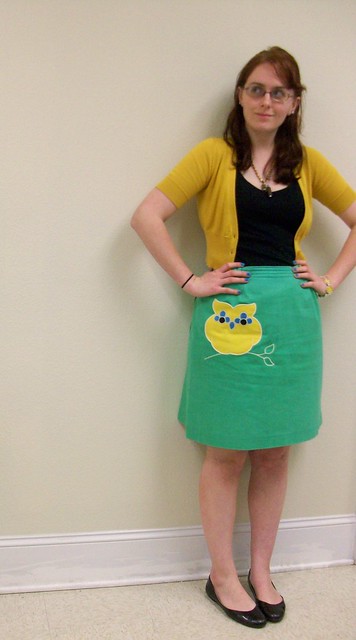
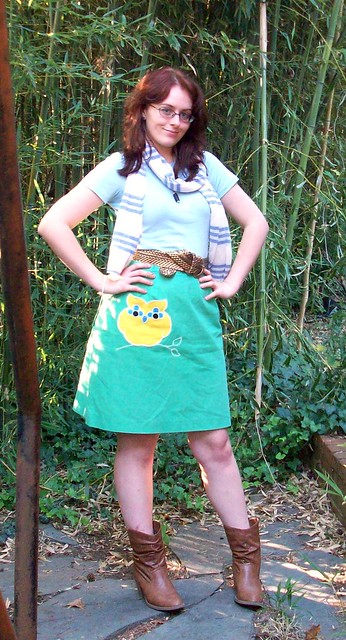
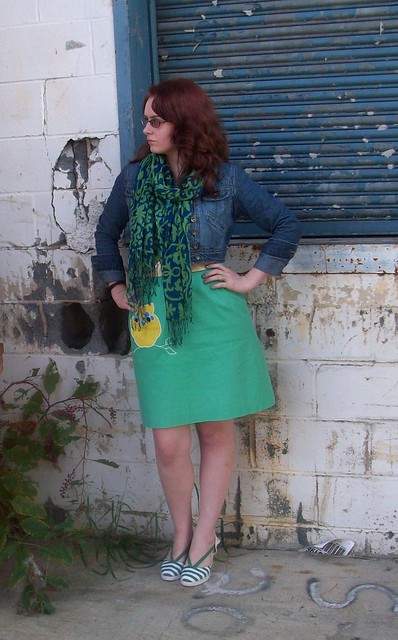
Thrifted and altered skirt
So are you ready to start making your own skirts? Burda Style offers free patterns to download. Or blow a little dough on Sew What Skirts, which has some really cute ideas and gives you multiple styles to try. I also saw two skirts I want to try in the MS Encyclopedia of Sewing and Fabric Crafts, (as well as a hundred other projects).


I've been obsessing over this New Look pattern, which is what I used to make the skirt above (and like 5 others). I'd still like to make a few more, I think some flannel plaids would work for the fall and winter. I want to try using some large men's shirts from the thrift store to turn into skirts. There's a good tutorial at Craft Stylish that yields one very cute skirt. There's also a video on Threadbanger that shows you how to make a skirt from shirt sleeves. (The video is for a lighter weight skirt from dress shirts, but you can definitely winterize by using flannel shirts instead.) Alright, now I need to go to the thrift store...


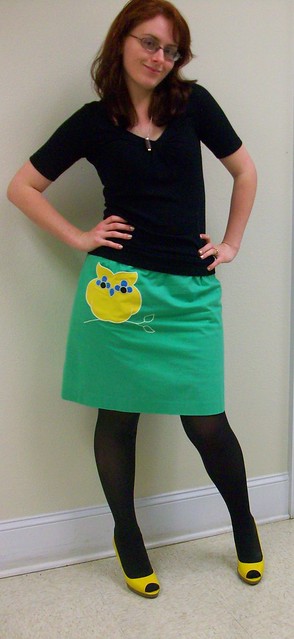
Speaking of thrifting, I found this freaking adorable owl skirt on a thrifting excursion. I think this would be pretty easy to do with some fusible web and a machine that does a satin stitch. (Tutorial time soon I think.)

Let me see how you rock a skirt!

Tuesday, October 19, 2010

Crafting Personal Style: Shirt of a Different Color


Despite my whinging, the solid polo actually doesn't not work with my style. My modus operandi tends to be insanely patterned thing + slightly less patterned thing + solid thing. Or alternatively incredibly patterned thing + several solid things that may or may not go with patterned thing.

If done correctly, this is actually a great way to build a wardrobe or work on refining your personal style. You can spend a little more on basics that fit well and will get a lot of wear, or special items that really capture your style. Look for jeans that fit well, an awesome pencil skirt, a fitted blouse, or a great structured jacket, or comfy tees in fun colors. Then you can add trendy or patterned things as you please for experimentation purposes. Thrift stores are a great place to find unusual items for little money. Since trends tend to cycle, you can also find items with a current feel for much less money. (Have I mentioned I love thrift stores? I feel like I should mention I looooooove thrift stores.) For example:


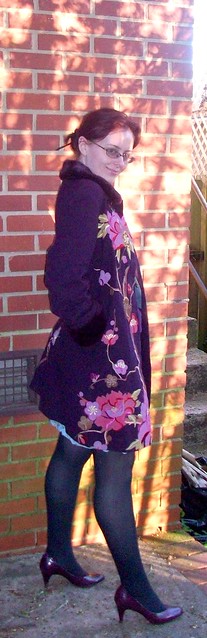
Is this coat weird and totally me? Yes! Is it something that is going to get a lot of wear? Probably not, honestly it's purple and has giant flowers and fake fur. But I got it for about $15 at a thrift store, so I won't feel so bad if my style keeps changing and it's not my thing in a year or two. (For now, I will wear it and rub my face on the collar constantly. So soft!)

If you want to work with what you have, consider the effect of color and pattern to make things look different and new. Pinstripes can look sophisticated with a solid blazer or funky with a fun floral. (I am awesome at alliteration, ha!) Animal print can look timeless as a scarf with a dark pencil skirt or young and fun with bright green boots and light jeans.


Pattern mixing is one of my favorite parts of sewing and dressing. It might seem daunting, but starting with some basic rules can help keep you from looking like you fell in your closet and wore what stuck. (Not that there's anything wrong with that.) Vary the scale and type of pattern. It's pretty hard to go wrong by pairing an organic pattern like a floral or paisley and a smaller scale geometrical pattern like a stripe or check. Small, subtle pattern like dots or pinstripes are great for adding a little interest to solids and for mixing with bolder patterns. Pairing a small scale stripe with a floral is one of my favorite combos. Don't think you have to be matchy, try finding a main pattern with several colors and maybe pulling a polka dot in one color and a stripe in two others. (Or just wear all plaid like Kasmira, this lady is seriously masterful with pattern mixing.) Try things together that you wouldn't think of, they may end up looking great together. Throw some coordinating solids together, like several different shades of sherberty colors or jewel tones. ColourLovers.com has a ton of inspiring color combos available to browse and search.


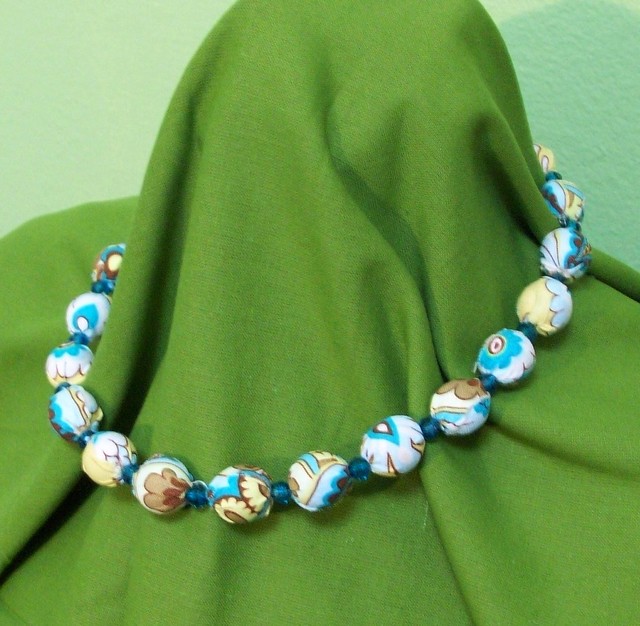
Interested in pattern? Small bits of pattern are a good jumping off point. If you're fond of your waist, you might try the belt tutorial I just posted. This takes pretty minimal sewing skills and even less fabric. Fabric cuffs are also simpe to make; sew together two pieces of fabric large enough to go around your wrist with some overlap then turn and add a closure. Mer Mag has an awesome scarf tutorial. Tights are also a good way to bring in pattern. Now is a great time to hit discount stores like Ross or TJ Maxx for tights, and Target has some great colors and patterns for $5. Make your own patterns by tie dying white cotton tights or printing your own design. Find some cute scraps and a bit of elastic and make this simple headband. The Moda Bake Shop has instructions for a necklace made from fabric beads. I've made one and it's very simple and fun (also a great way to use up teeny scraps).


The weather is getting chilly and gray, I want to see how you bring pattern and color into your life!

Tuesday, October 12, 2010

Fabric Belt


These fabric belts are super fast and easy, and a great way to throw a little pattern into your outfits or draw attention to your waist if that's your inclination. I started making these as a way to get rid of some of my stash and I got a little addicted. They are also suuuuper cheap to make, which is always awesome. These instructions make a belt about 3" wide, but you can adjust the fabric width is you want.

Before you start, measure around your waist where you want the belt to sit. Add about 10 inches. Then gather up your supplies. You will need:


- Two strips of fabric measuring 4" wide by the length you determined. (If your fabric isn't long enough,  just piece two bits together.)
- Fusible interfacing 3" wide by the length you determined less 1". (For example, if the length you determined is 40", you want to cut your fusible at 39".)
- A wooden or plastic ring. I used a shower curtain ring that came in a pack of 12 for like $1.50. Purse hardware or decorative belt buckles would also work well.
- Big huge snaps
- Matching thread
- Monster needle
- Marker
- Iron


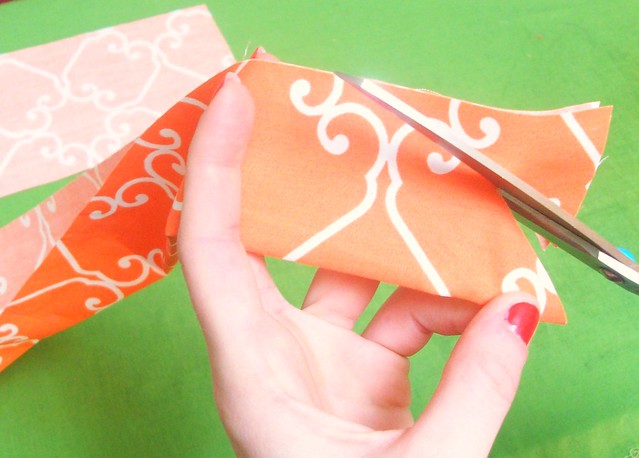
Fold your fabric in half widthwise and trim a sort of leafy shaped point. The shape is totally up to you, this will be the little fold over bits on the ends. Use the first one as a template for the ends of both fabric strips and the fusible interfacing.


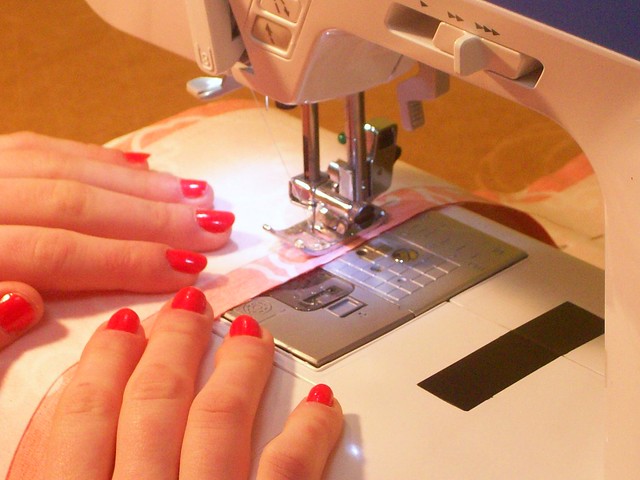
Center the interfacing onto the back side of one of the fabric strips and iron in place. Pin the fabric strips right sides together and sew together with a 1/2" seam, leaving a 2" gap for turning. (Sew right along the edge of the interfacing so it is not caught in your seam.)


Before turning, trim down the seam allowance on both tips. This will keep there from being too much bulky fabric. Turn right side out through the gap. Use a chopstick to push the seams out from the inside and press the edges with a hot iron. (It helps to kind of roll the edges in between your fingers before pressing.)

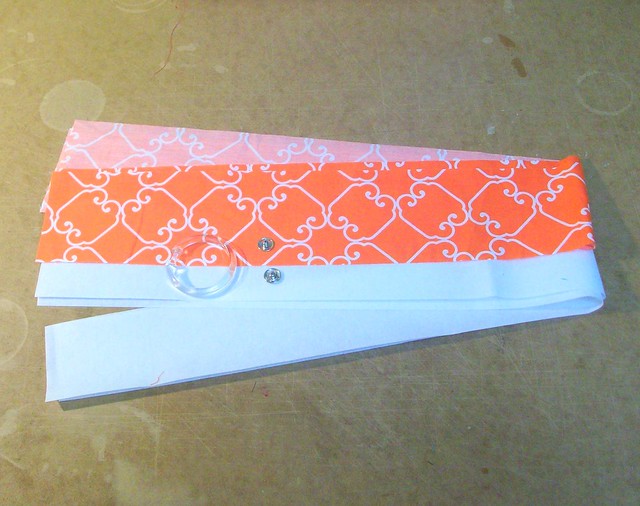
Once the belt is all pressed and pretty, wrap it around your waist and feed the ends through your ring, folding the belt back on itself. (Look at the picture at the top for reference.) Play with it until your sides are even, mark where each tip ends with a pin and remove from the ring. Fold one side over the ring, matching the end to where you marked with the pin.


Make several small stitches on each side, trapping the ring. (Since you are going through four layers of fabric and 2 of interfacing, this is where a monster needle comes in handy. I use an upholstry needle.)

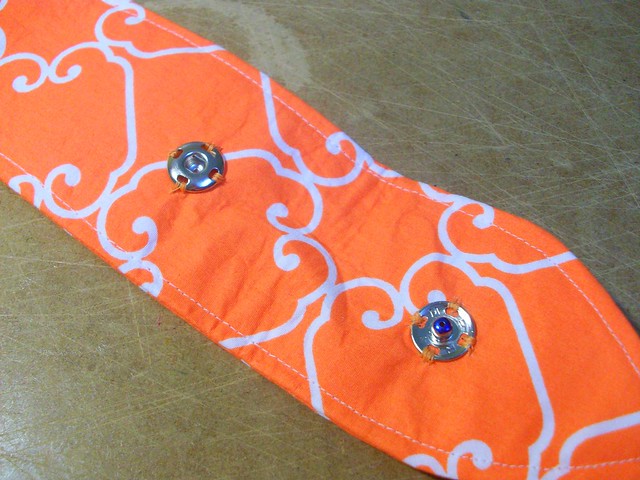
Fold the other side of your belt over the ring, making sure your flaps are on the same side. Mark where the fabric folds over the ring and measure about 1" away. Stitch the male part of the snap in place (the one with the sticking out part in the middle), centering on the fabric.


Color the sticky out part of the snap with a marker. (See how mine is blue?) While the ink is still wet, fold over and mark where the other side of the snap should go. Stich the other side of the snap in place. To take the belt on and off, just wrap pull through the ring and and snap.

I want to try one with some trim around the edges; I think ric-rac would be really cute. You can also sew a cute button and buttonhole instead of snaps.

Thursday, September 16, 2010

Crafting Personal Style: Work What You've Got

The cheapest way to freshen up your wardrobe is to just change what you already own. Even the cutest peices can start feeling a little stale and boring when you've worn them fifty times. Altering and embellishing can make something old feel and look new (or at least new to you).


A little altering can make an amazing difference. Simple alterations like hemming or adjusting fit are pretty easy if you have some basic sewing skills. Marisa at New Dress a Day makes quick and easy alterations and turns $1 horror shows into adorable outfits.

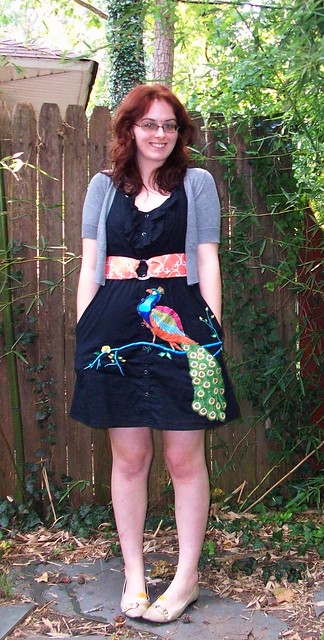
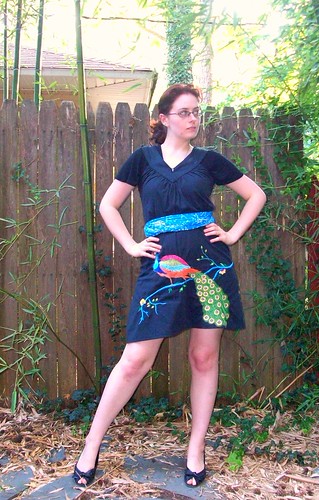
The shirts my job provided were a lovely square shape, so the first order of business was to take them in a bit. (Check out this tutorial at Fashionomics.) Several of my thrfted skirts are altered too. I've found some great ones for just a few bucks and all they needed to be cute was a few inches taken off the hem. My favorite dress started life as a $2.50 thrifted kaftan. (Side note: dresses with giant peacocks on them are incredibly versatile, don't let anyone tell you differently.)


If the fit isn't the issue so much as terminal boringness then it's time to embellish. I figure the best way to distract from a boring polo shirt is with interesting and unique pieces. I can exercise my creativity and save some money towards the start up costs for my future small business (where I can wear what I want). Need some ideas?

Add some details to your basics. Plain blazers are plentiful and cheap (about $5) at thrift stores, and I'm loving blazers with contrast edging.
How easy would this be to do with some bias tape? I have a cord blazer that I think will look awesome with some scholarly elbow patches and floral print edging. Grab a bias tape maker and get to work! Bias tape could also look cute along the edge of a skirt, around the arms of a blouse, or to create stripes on a jacket sleeve or pant leg.

Appliques are an easy way to add character and interest. Most craft stores will have a selection on iron on embroidered patches. Check out Etsy for some more original options. I found these these awesome skull patches. If you want a little more glitz, go for beaded or lace appliques. Check if your local fabric store has a bridal section, or look online. I already found some I want at sequinappliques.com, including a sequin stegosaurus.

Also look at thrift stores for uniforms with patches or old formal dresses with applique pieces, the whole piece may cost you the same as a new patch would. If you want to be able to change it up a little, sew or glue a pin back or two on. (This will extend the life of you applique too, since you can take them off to wash your clothes.)

New buttons, one of the cheapest and quickest ways to change the look of an item of clothing. . If you need some instruction on sewing buttons, check out this video from Threadbanger. Take your garment with you, or snip off one of the old buttons to take with you for size. I found some disgustingly cutesy little buttons on Etsy from sellers Mr Walrus and Thai Fab Shop. You can also make your own buttons with a covered button kit and some cute fabric. I made a little skull button with a teeny piece of my embroidery.


Find yourself a stud or two. A lot of interesting looks seem to be all about mixing cute and masculine, and I'm all about metal studs for the perfect punky touch. You can grab some at studsandspikes.com, a bag of 25 will run you less than $5.00. (You can grab a kit to set them, but I distinctly remember just making do with pliers as a "rebellious" teenager.) I'm thinking floral wristbands with metal studs? Studs and chains from the hardware store could add some interest to plain boots.

Embroidery is easy, cheap, and you can even take it with you to work as a little lunchtime craft therapy. Grab a hoop and head over to Sublime Stitching or Mr X Stitch (where you can get my Internet meme embroidery patterns, by the way). You can also grab free patterns at Needlecrafters. Beads or charms would make it even more interesting.
I'd love to hear your ideas for embellishment.

Wednesday, September 15, 2010

Polo Anyone?

No, not the good kind with ponies. This week marks the beginning of a mandatory polo shirt regimen at work. While I don't want to complain, (to have a job at all is awesome and come November I'll have health insurance for the first time in five years), I can't help but be a bit bummed about this. The company is footing the bill for seven of the polos pictured below.


So why is this bugging me? I'm a creative person in a job that's more spreadsheets than right brain activity. Some people unwind with alcohol or video games, I use embroidery or sewing. (Stabbing things repeatedly with a needle is the perfect way to unwind after a bad day, right?) I like to wear things I've made, I'm proud to be complimented on something I put my time and effort into. It's important to me to show people that you can still sew your own clothes and make your own jewelry; these skills are not lost and they are worthy of the work it takes to become good at them. I want to be able to complement things I've made with the clothing I think showcases it best.

Another thing to consider is my participation in the Wardrobe Remix pool on Flickr, taking pictures (almost) daily since the beginning of the year. Fashion and exploring my sense of style have become fulfilling creative outlets for me, and ones I can easily tie to my other creative energies. Finding interesting mixes of pattern and color is just as much fun with clothing as with fabric for a bag. My personal style also tends towards a little more dressed than a polo shirt, something that sometimes gets me odd looks at my super casual workplace. But for me, a polo shirt feels under dressed. It makes me happier and more energetic, and I don't want to fall into a rut of jeans and schlumpy polo shirts. (Not that there's anything wrong with that if that's how you feel best.)


But I've decided not to concede, I am taking this up as a craft challenge! I'll be posting about how I intend to keep my wardrobe fun and crafty for not a lot of cash. I'd love to other people's thoughs and ideas as well.

Saturday, August 28, 2010

Mission Accomplished

So here are the results of last weekend's labor. I made three skirts, one of which still needs to be hemmed. Am I the only one who absolutley HATES to hem? These skirts are full and there is a lot of hemming to be had. I modified the pattern a little (New Look 6892). The pattern calls for gathering along the front and back to make the fullness. I made a pleat in the front and a dart in the back instead. I also left off the zipper and made the waist elastic, because I kind of suck at zippers and all I had on hand were 14" black ones.

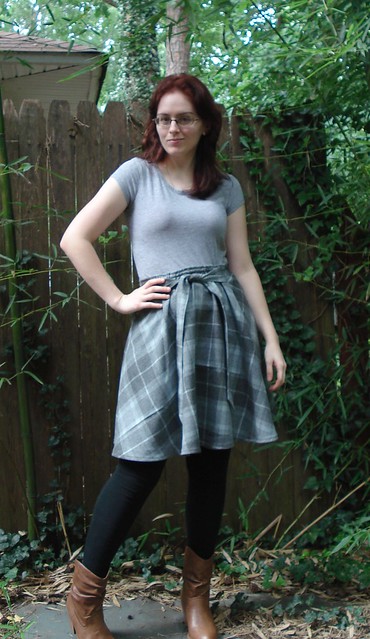
Excuse the fact that I look like I just rolled out of bed...because I kind of did. The fabric is a piece of lightweight wool or wool blend tartan that was from my dad. The pattern is similiar to our family's dress plaid. (Partial Scot in the hizzouse!) I had to get a little creative with the plaid matching as I didn't have a whole lot of fabric. Really the only place it matches is at the front waistband, which is hidden under the bow. But take my word, it is some masterful plaid matching. The waistband is lined with left over fabric from this shirt that I made for my dad awhile ago. 


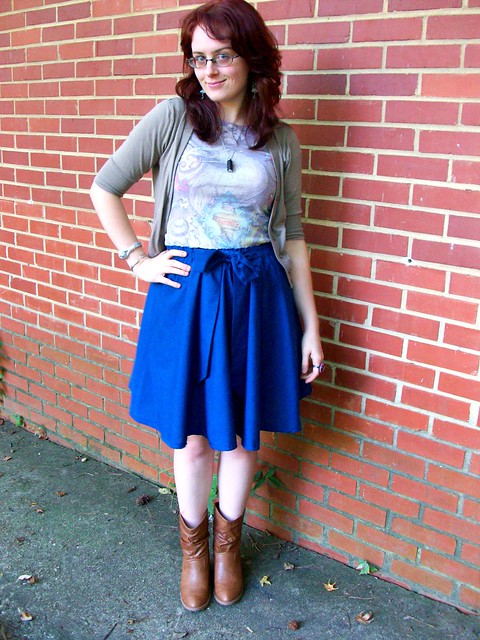
This one is made from some blue cotton, it's very light and swishy. On the two previous skirts, I didn't have enough fabric to have the waistband lining match. I had enough on this one, but I kind of liked the idea of having a contrasting lining. (Like a little skirt secret.) This one has a small green striped cotton.
Boot rocking and Queen listening was also accomplished.

Saturday, August 21, 2010

This Weekend's Agenda

This weekend I plan to...

...make some skirts (with large doofy bow of course)...

Rock out in my snazzy new boots...


...and probably listen to some Queen. Sounds like a good weekend to me.

Thursday, July 29, 2010

Dolls, Dolls, Dolls

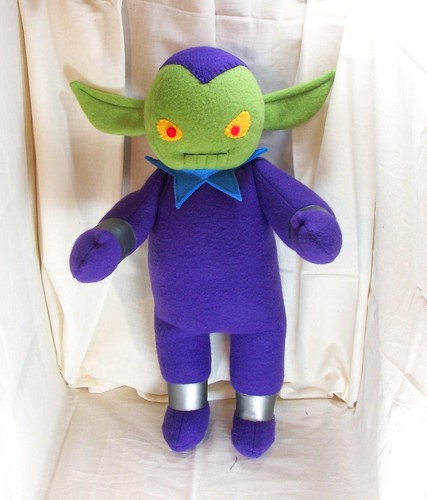
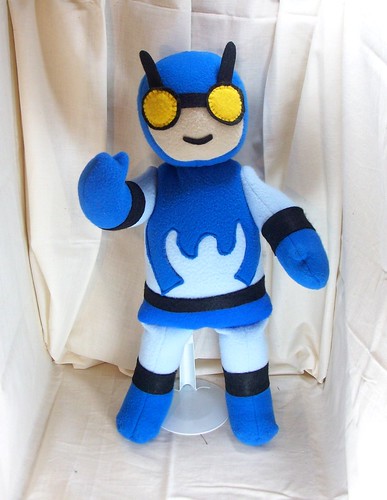
I've been very busy making the next batch of dolls for the wonderful folks at Southern Fried Comics. Rorschach, Etrigan, and Ambush Bug made their retail debut on the website and a new batch is on the way for the store opening early next month. This set is comprised of:


Squirrel Girl, flying in to save the day and steal your acorns. This is the first female character I've made multiples of. Her hair was a kind of a new process, but I think it turned out well. She's based on the original design.
A Skrull, in all it's grumpy glory. The giant pointy ears are my favorite and now I want to make Yodas. (Just kidding George Lucas, please don't sue me.)

Ted Kord (minus head wound) Blue Beetle. Of course plans for his good buddy Booster Gold are in the works.


I've also been playing around with a photo set up, as people will probably be more inclined to buy my dolls if they can actually tell what they look like. I already had some clamp lamps with the "natural light" bulbs. Luckily (this once) my boyfriend orders lots of toys, so I stole a big box to use as my backdrop. Just remove the top and one side, drape with fabric, and clamp on lamps. Background changes are easy and the lighting is totally adjustable. Also it's cheap, which never hurts.

Tuesday, June 15, 2010

Party Time


I'm going to the Craft Party this Friday, June 18th. You should come too!

Midwood Park
2100 Wilhemina Ave
6 - 8 pm

Handmade raffle
Supply Swap
Mini Terrariums
Cupcakes!

Patchwerk Playhaus
1508 Central Ave
8-10 pm

Craft circle
Screening of Handmade Nation

Check out the Facebook Group for more info.